 Slovenčina
  España
  Francais
  Čeština
  Romanian
  Arabic
  Português
  Indonesian
  Croatian
  Serbia
  Farsi
Farsi  Mongolian
  Georgia
  Azerbaijani
  Thai
Thai  Turkish
  Magyar
 Modifying the structure of the printouts (available in version 2009)


By default, the software provides the most common report types. For example, Printout for each class, or summary timetable for classes. You can change the look of these reports. However, there might be situations where you need bigger changes. Typical example might be to modify the report for each class or students, so that it doesn’t show days/periods but rather terms/periods. This is very useful for schools that have the same schedule each day during the semester.
כברירת מחדל, התוכנה מספקת את סוגי דוחות הנפוצים ביותר. לדוגמה, תדפיס לכל כיתה, או סיכום מערכת שעות לכל הכיתות. יש באפשרותך לשנות את תצוגת דוחות אלה. עם זאת, ייתכן מצב שבו אתה צריך שינויים גדולים. דוגמה אופיינית יכולה להיות שינוי הדו"ח עבור כל כיתה או תלמיד , כך שזה לא יראה ימים/תקופות אלא תנאים/תקופות. זה מאוד שימושי עבור בתי ספר להם יש את מערכת שעות זהה בכל יום במהלך הסמסטר.
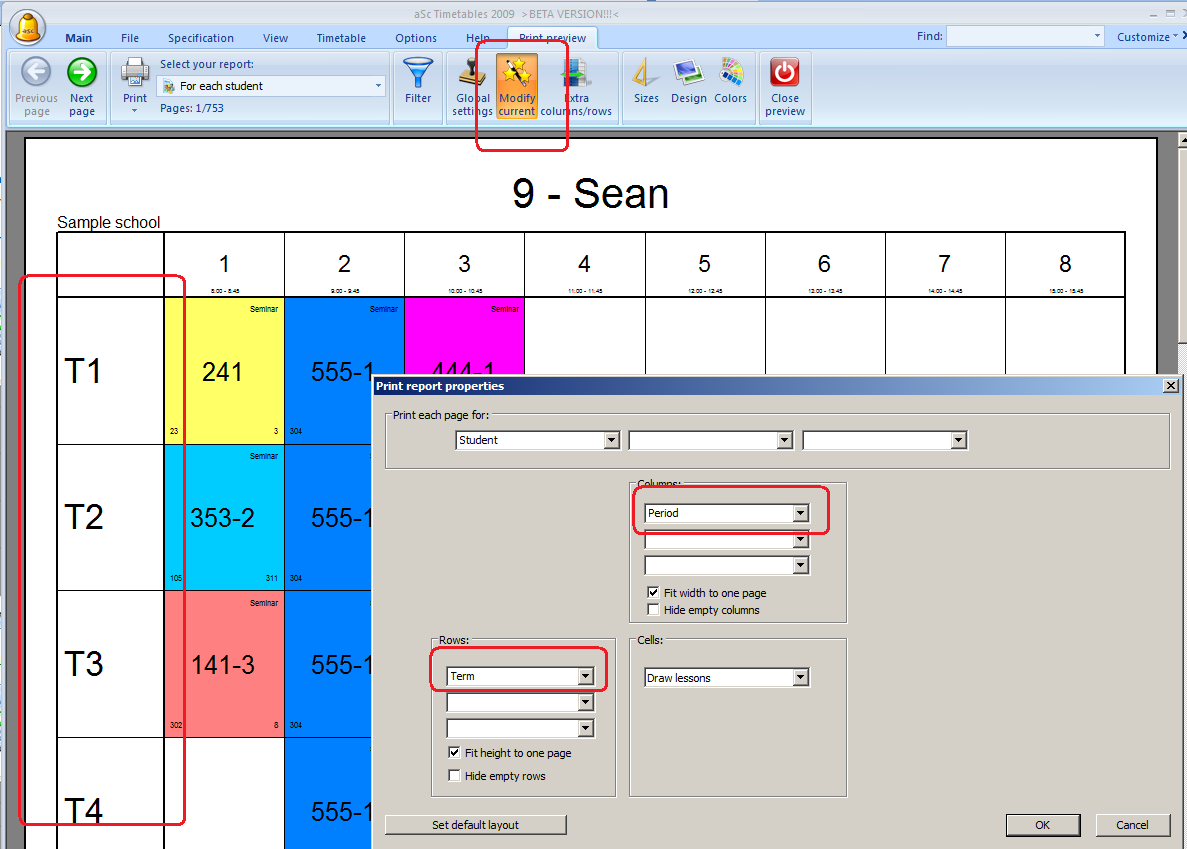
In order to create this report, all you need is click Modify Current and change what shall be displayed at the left side:
על מנת ליצור דו"ח זה, כל שעליך לעשות הוא ללחוץ על שנה נוכחי ולשנות את המוצג בצד השמאלי :
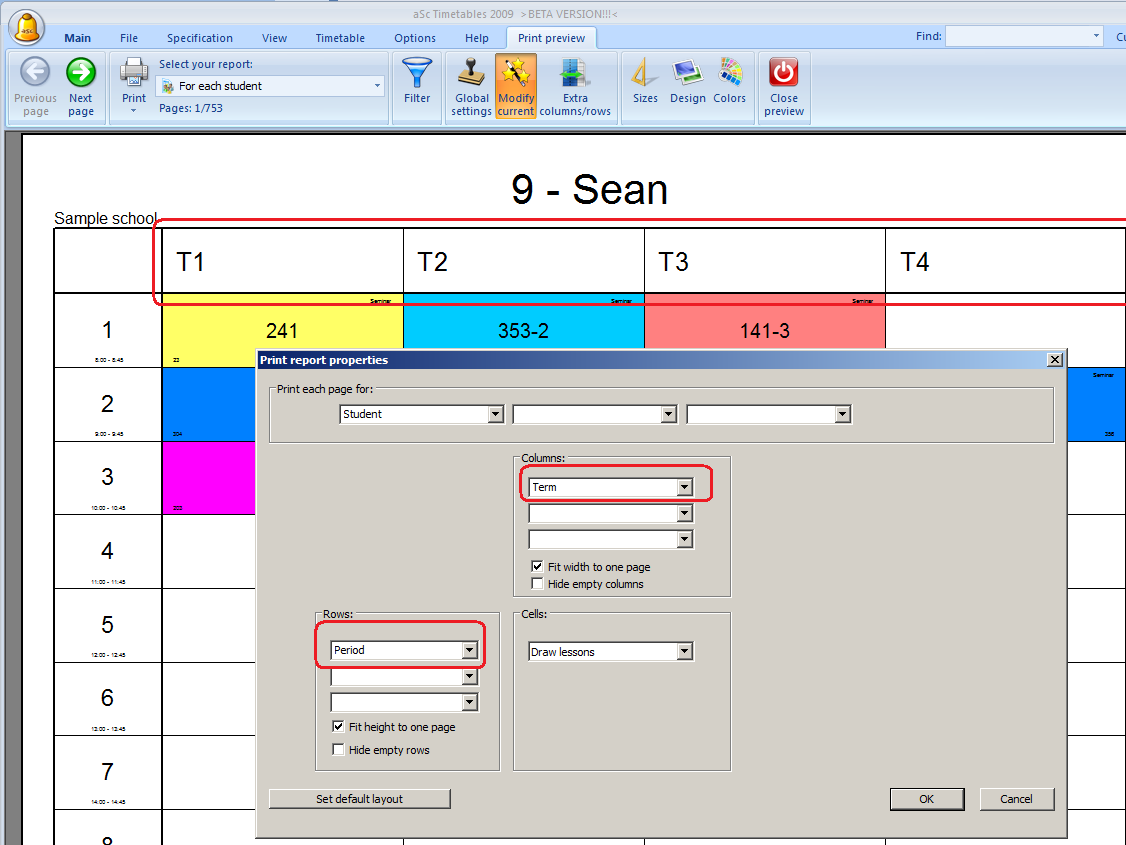
If you want the same report but periods at the left side and terms at the top, simply swap the contents of the rows and column definition comboboxes.
אם אתה מעוניין באותו הדוח אך התקופות יהיו בצד השמאלי והתנאים בחלק העליון, פשוט החלף את התוכן בין השורות לעמודות בתיבת הסימון.
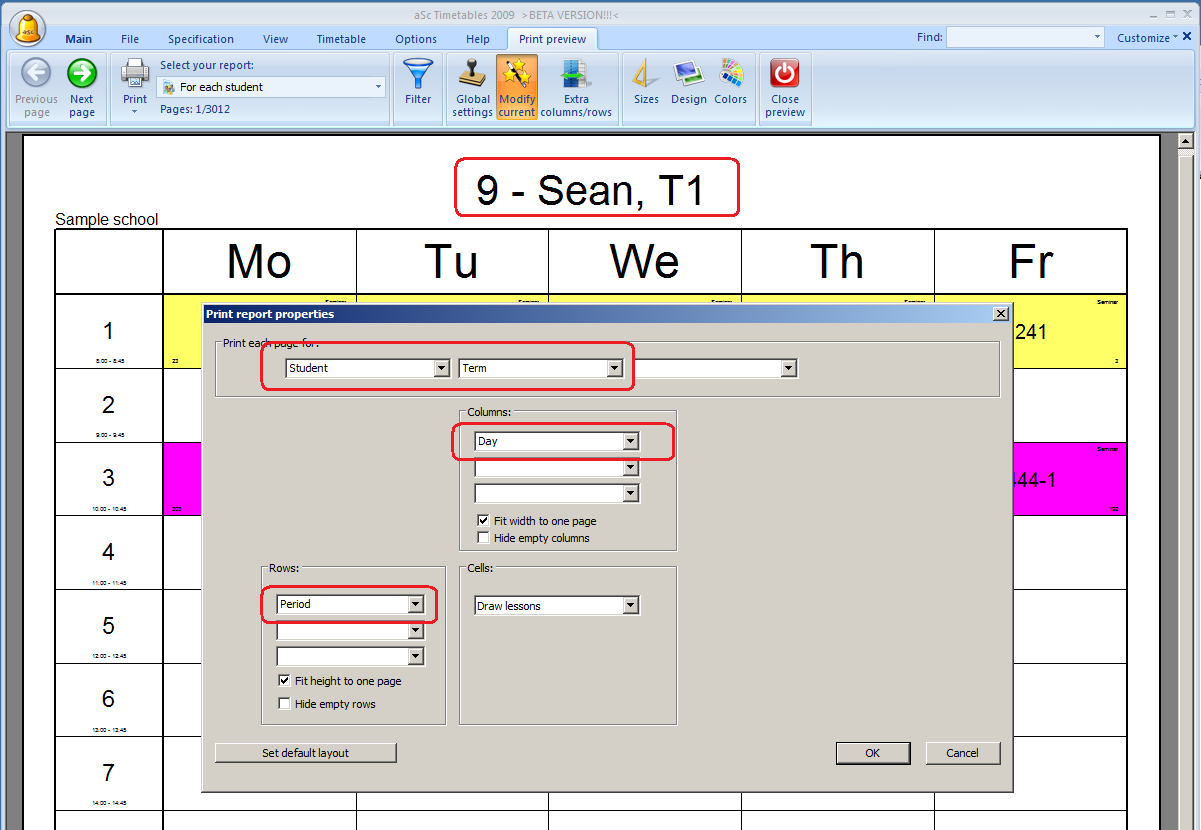
If you for example have different timetable each day and each semester, you can print a separate paper for each student and each term. Simply specify at the top part what shall be on each page. By default there is one page per student, you can add term in there:
אם למשל יש מערכת שעות שונה לכל יום, ובכל סמסטר, אתה יכול להדפיס עמוד נפרד לכל תלמיד ולכל טווח. כל שעליך לעשות הוא לציין בחלק העליון מה יהיה בכל עמוד. כברירת מחדל יש עמוד אחד לכל סטודנט, אתה יכול להוסיף תנאי מערכת השעות בכל יום במהלך הסמסטר:
Now, whenever you will select in the main combobox that you want to print timetable for each student, this new modified layout will be used.
Note that you are always changing the current layout. You can press button Set Default layout to get the default values. This will reset all your changes.
Before modifying the layouts, make sure you are editing the correct or nearest report. Theoretically, you can modify the summary timetable of teachers so that it prints one page for each teacher. But you already have such a report in defaults and you will have to no summary then. In this case, it is better to modify the original for each teacher report.
עכשיו, בכל פעם שתבחר בתיבה הראשית שברצונך להדפיס מערכת שעות לכל תלמיד, שינוי הפריסה החדש יהיה בשימוש.
שים לב שאתה תמיד משנה את פריסת התצוגה הנוכחית. תוכל ללחוץ על כפתור קבע כברירת מחדל ופריסת ההדפסה תשוב ותקבל את ערכי ברירת המחדל. זה יאפס את כל השינויים.
לפני שינוי פריסות, ודא שאתה עורך הדפסה לדו"ח הנכון או הדו"ח הקרוב ביותר לצרכיך. באופן תיאורטי, אתה יכול לשנות את סיכום מערכת השעות של המורים כך שיודפס עמוד אחד עבור כל מורה. אבל כבר יש לך דו"ח כזה בברירת המחדל ואז לא תהיה לך שום סיכום . במקרה זה, עדיף לשנות את דו"ח המקורי עבור כל מורה.