
 Francais
  Polish
  Russian
  Čeština
  Greek
Greek  Lithuania
  Romanian
  Arabic
  Português
  Indonesian
  Croatian
  Serbia
  Farsi
Farsi  Hebrew
  Mongolian
  Bulgarian
  Georgia
  Azerbaijani
  Thai
Thai  Turkish
  Magyar
 Quick start with payment module
bank account, payment plan, to create a payment plan, school fee, cantine fee, excursion


Basic settings for Payment module can be made in 2 steps:
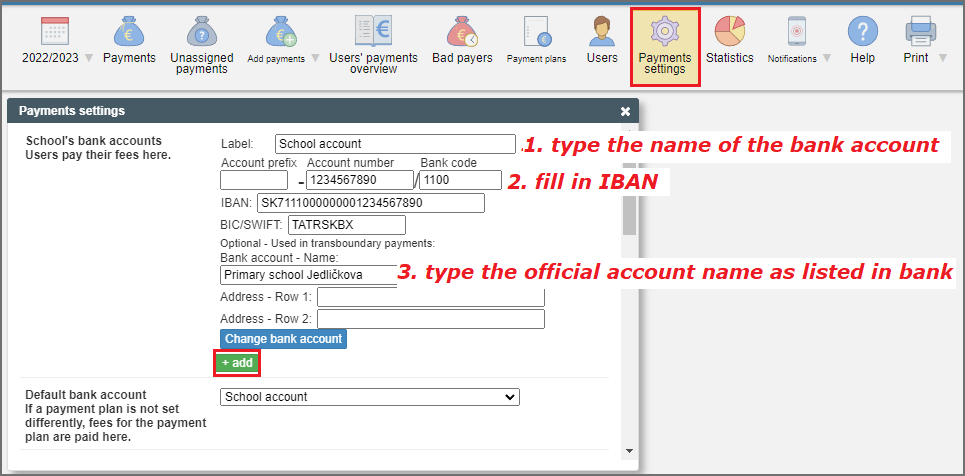
1. First of all we have to define school´s accounts. There is need to set up all bank accounts for cashless payments - e.g. school account, cantine account, class account, etc.
After clicking on Payment settings fill the required fields.
Label stands for the account name that will be visible for Users on EduPage so it should be short and describe the purpose of payments (e.g. School cantine, School fees, School club, Class account, etc.).
To add another school account just use the green button +add. You can also select one of your accounts as default account.
2. Second step is to define Payment plans - what, how much and until when to pay. To create a new payment plan just click on the button +Add payment plan and follow the steps.
We recommend to use also the Specific code to diversify the purpose of payment in case of many payment plans connected to one bank account.
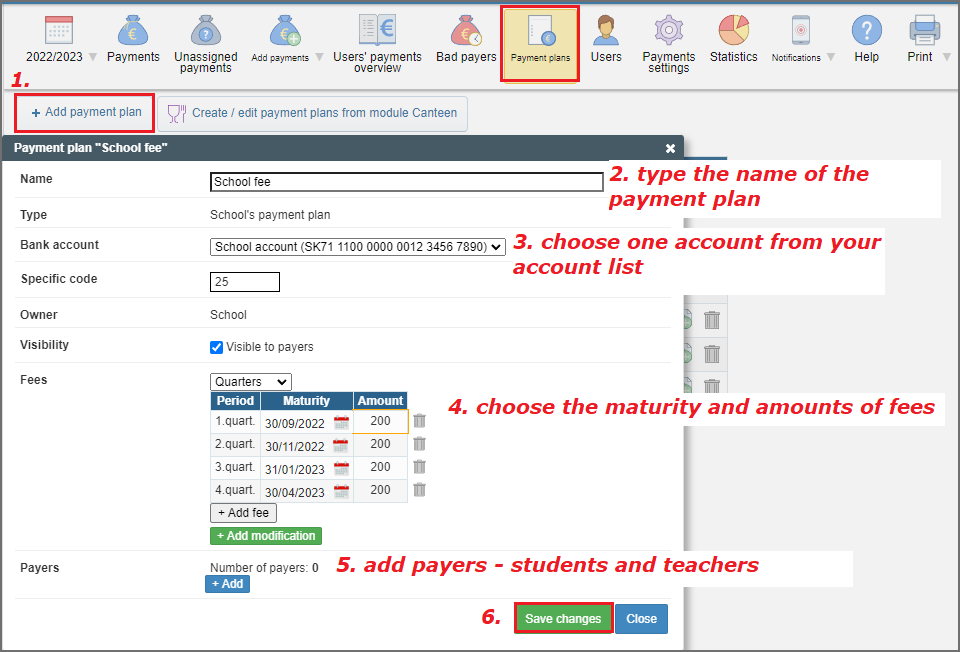
READY! Payment plans are successfully created and parents can pay the fees.
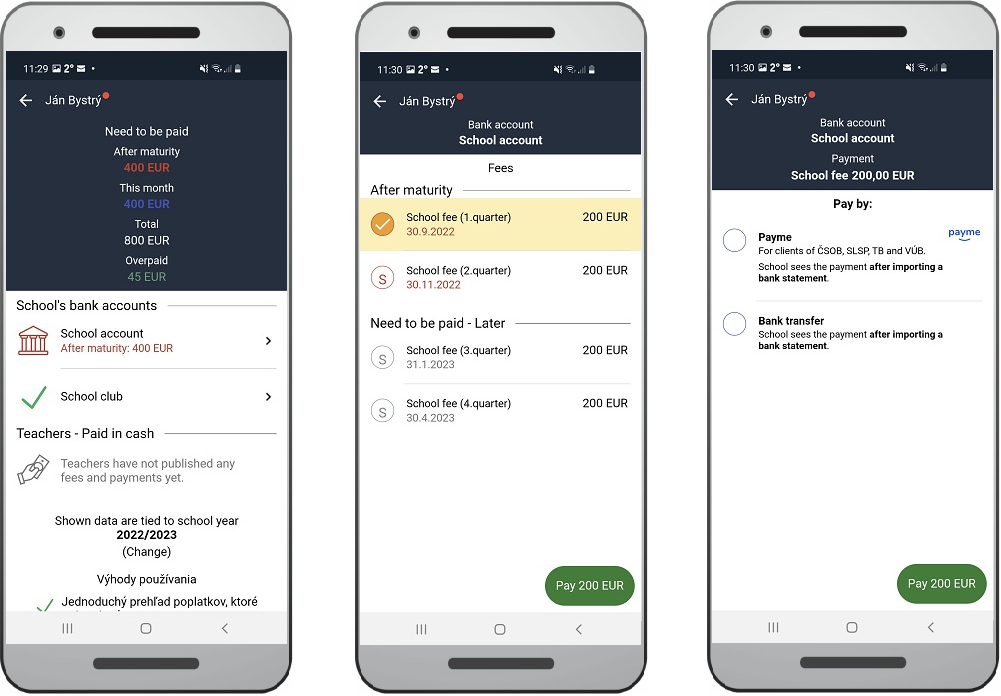
How are the payment plans visible for parents?
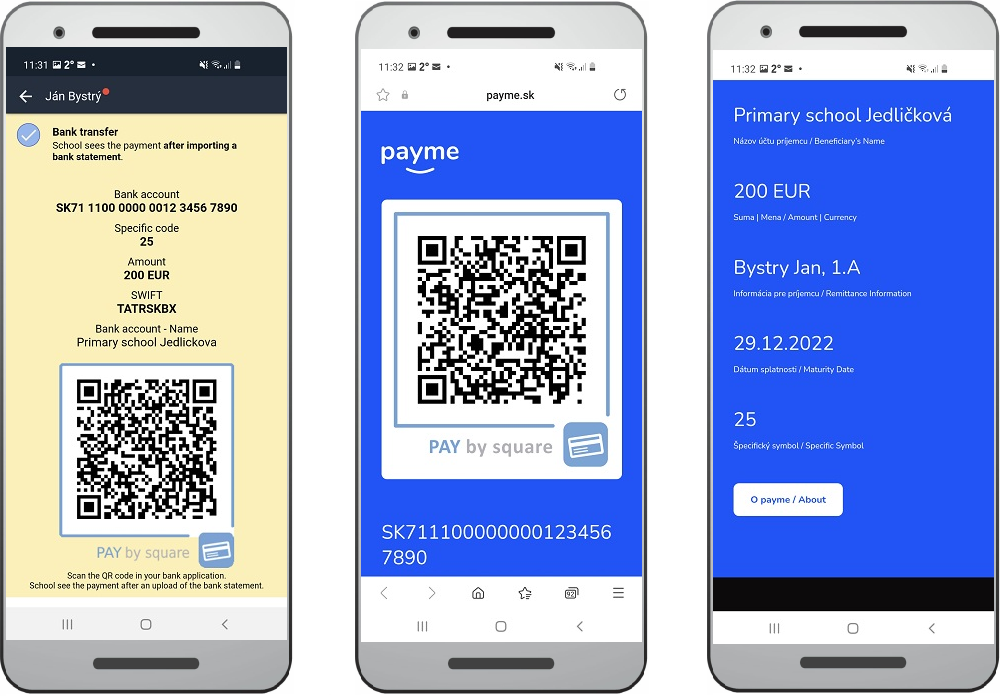
Once the payment plan is created parents receive the notification about new payment plan. In the EduPage app can be seen what, how much and until when is needed to pay. Just with one click can parent choose the fee to be paid and all payment data are automatically filled in. In this case parent can choose between payme and bank transfer.
Chceck also example of usafe for schools here: Payments module