How to create the first TimeTable OFFLINE
first step, new timetable
When you open the ASC TimeTables software installed on your computer, you can immediately start with creating your new timetable. If you are new to ASC timetables, we recommend you to use "the wizard" first. It will help you with basic settings of your timetable and also with adding all necessary data.
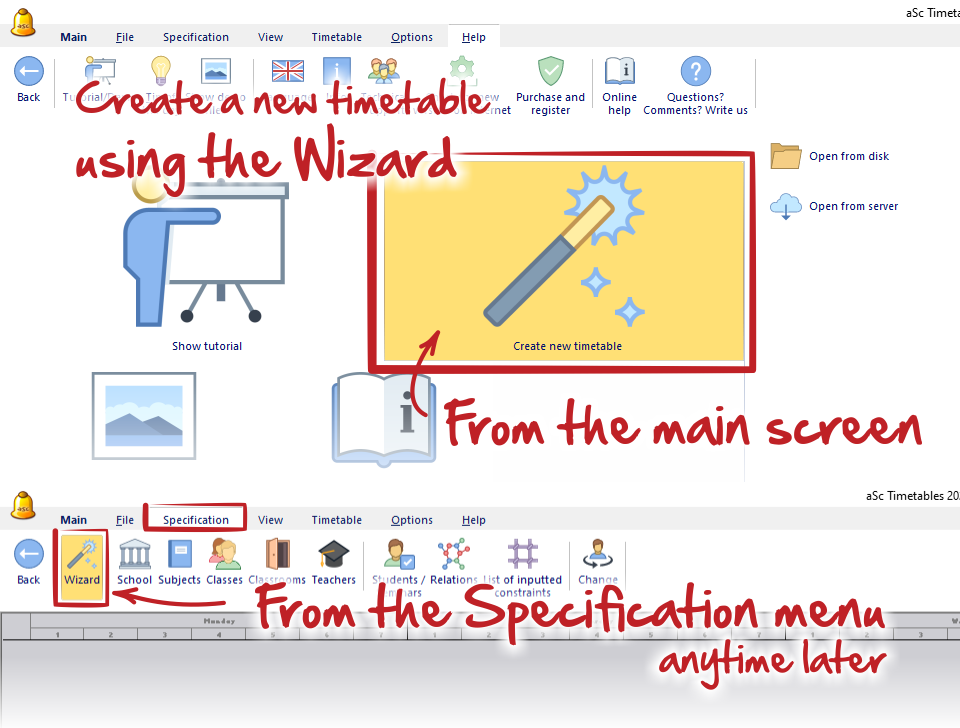
Click the icon "Create new timetable" on the main screen, or use the menu "Specification - Wizard".
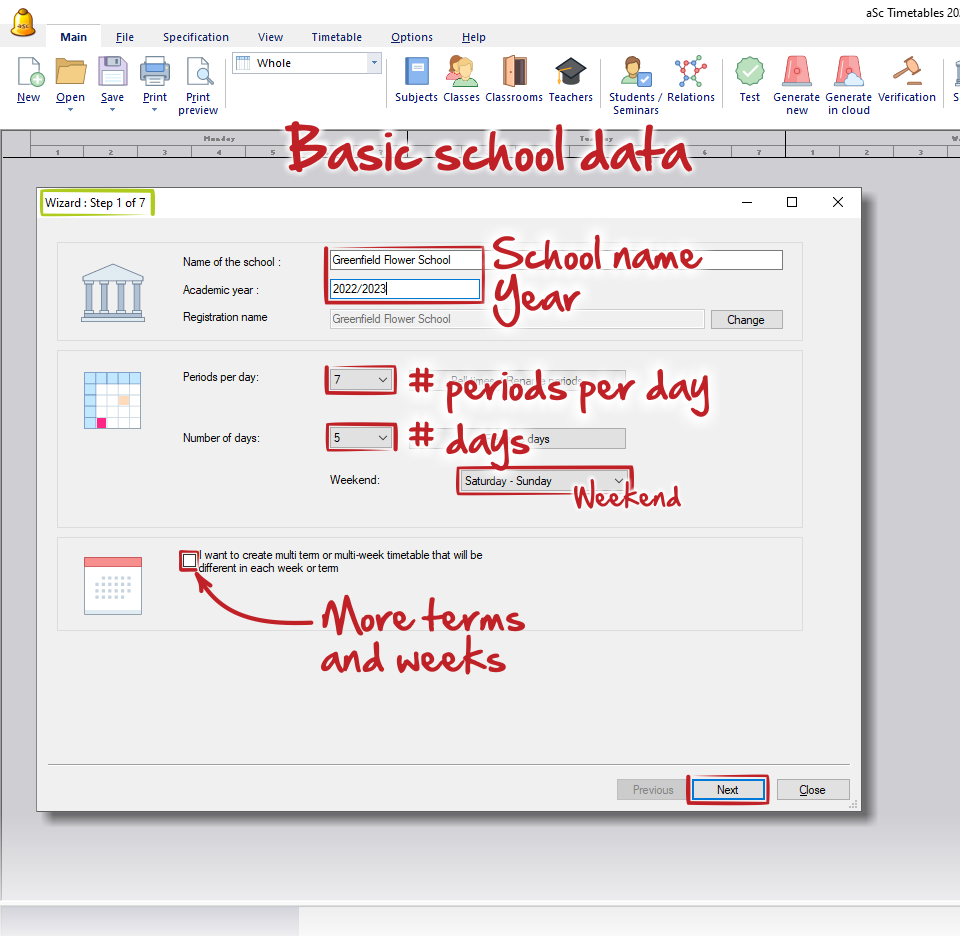
1. In the first step fill the "Basic school data" - write the name of your school, actual school year, how many periods shall be in one day, the count of days in a week, select the days for a weekend and if you wish you can also create timetable for more weeks or terms.
See more details here: Basic data
When everything is set, click "NEXT".
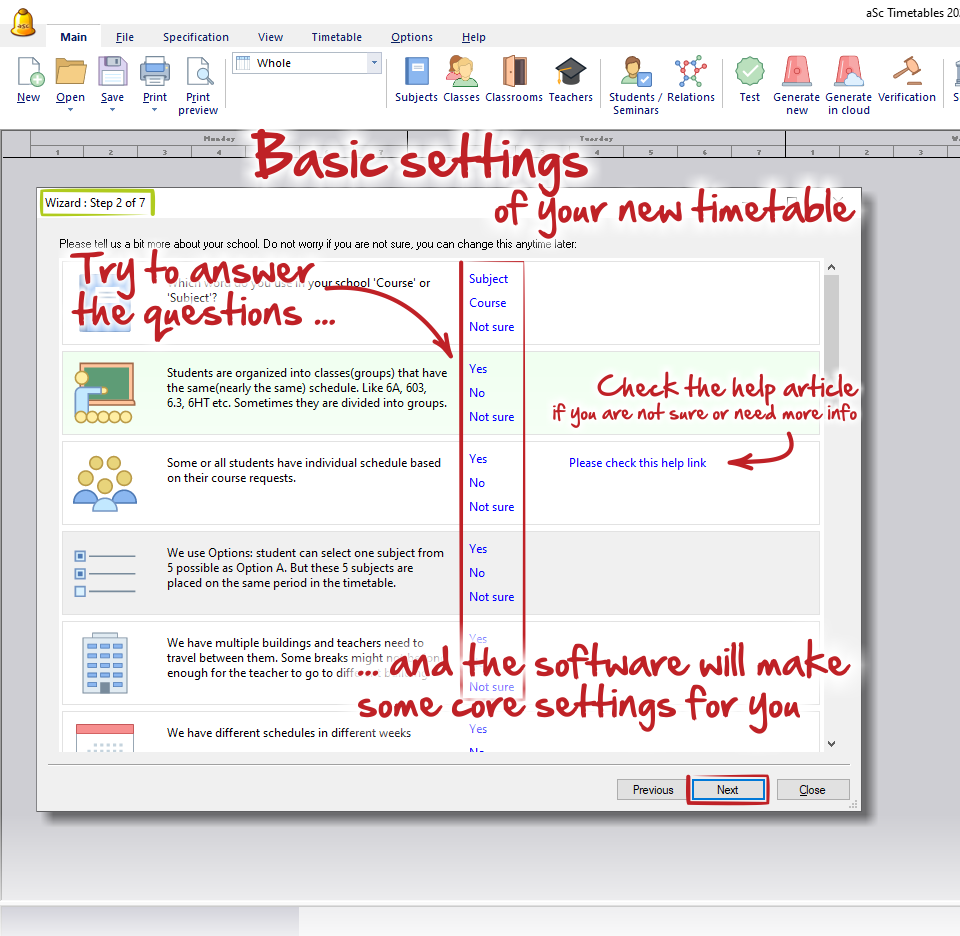
2. In the second step we prepared couple of questions, which shall help you with Basic settings of your new timetable. According your answers the software will make the core settings of your timetable. You don't need to answer all questions, everything can be set later.
Sometimes the link with help article will be displayed. We recommend you to check it to correctly understand the meaning of the question, or just to find out more information.
When you are done, click "NEXT".
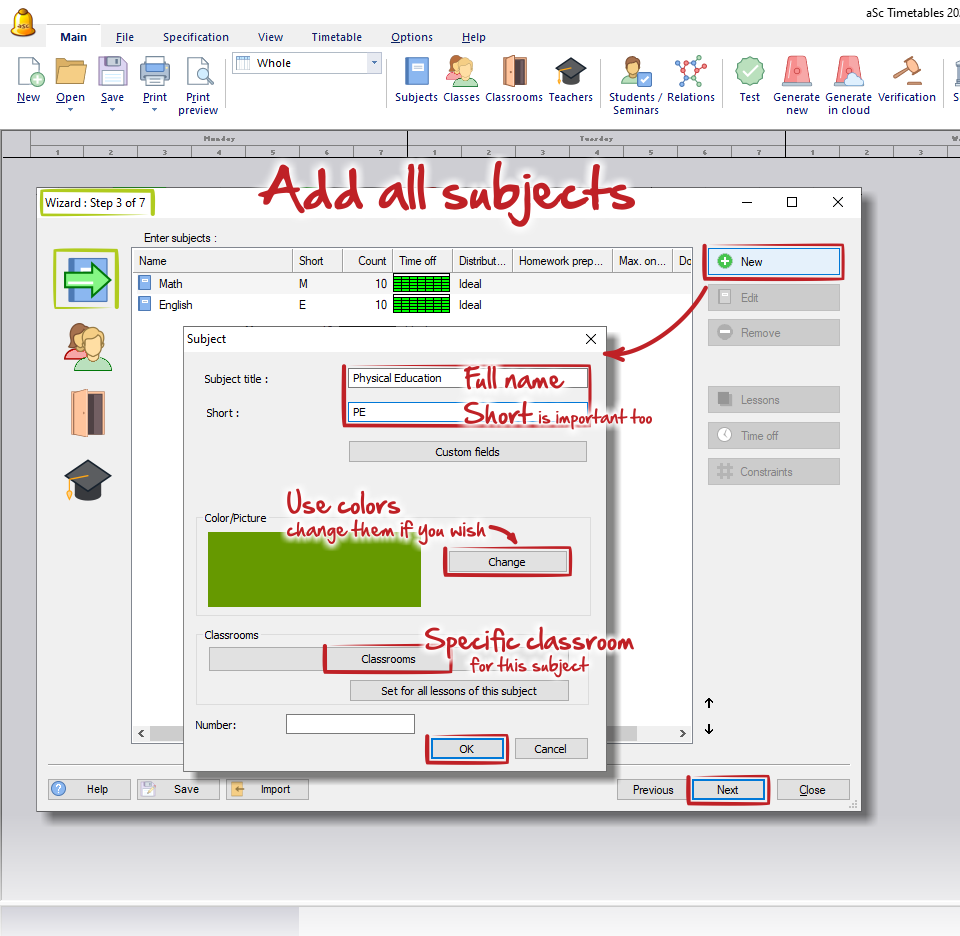
3. In the third step you will be asked to create all subjects / courses you are teaching in your school. Input the full name and the abbreviation - the short name of the subject, which is very important, because abbreviations are often used in our software during the work. Then you can select the new color, which will be used on cards and you can also specify subject's default classroom or classrooms (e.g. Gym for Physical education).
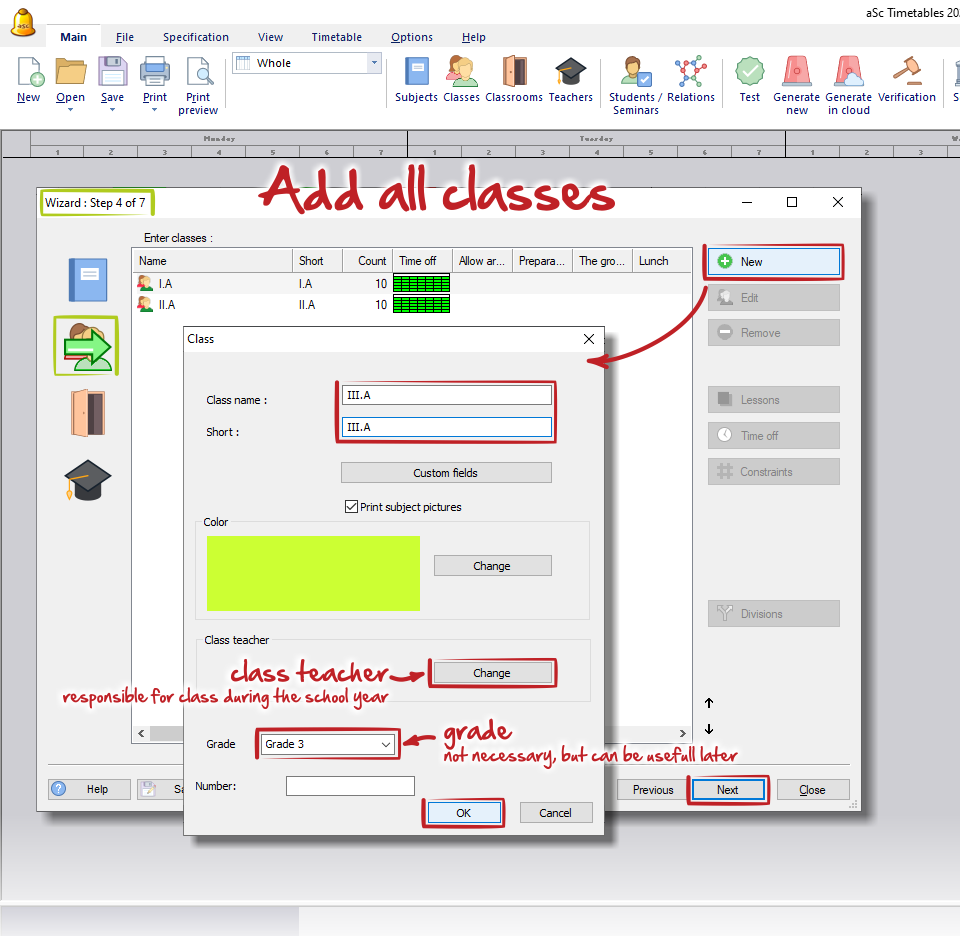
4. In the fourth step create all classes or grades. Please see, what aSc TimeTables means by "classes": What are classes (grade levels)..
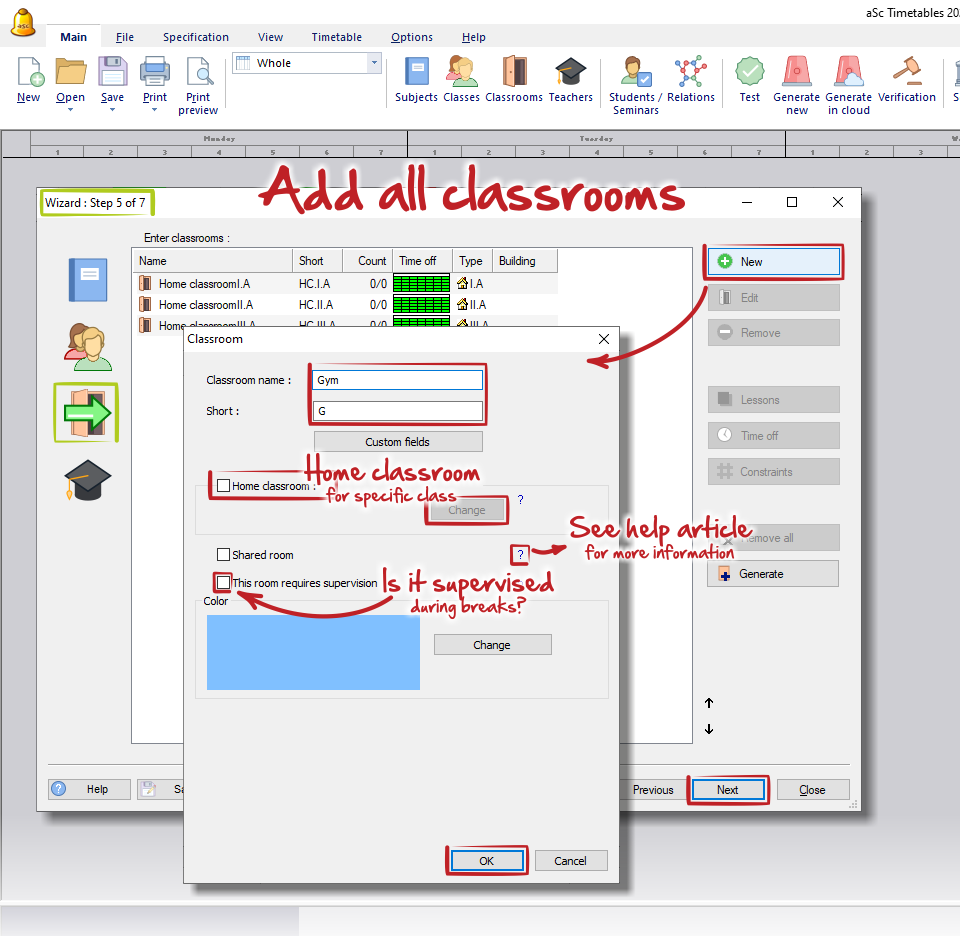
5. In the fifth step add all classrooms in your school's building. Do not forget about Gym or Library, if you are using them for teaching, or Canteen if you wish to supervise it.
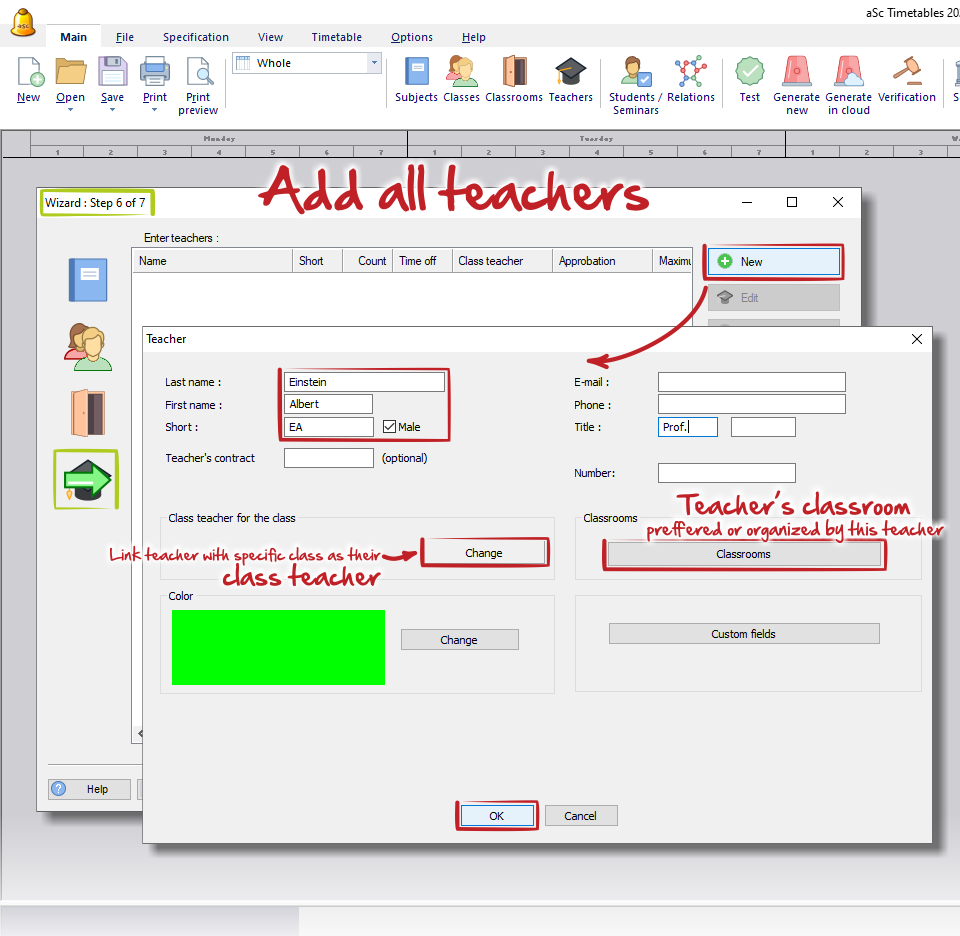
6. In the sixth step add all teachers in your school. You can select their default classrooms (e.g. some chemistry or biology laboratories, gym, ...).
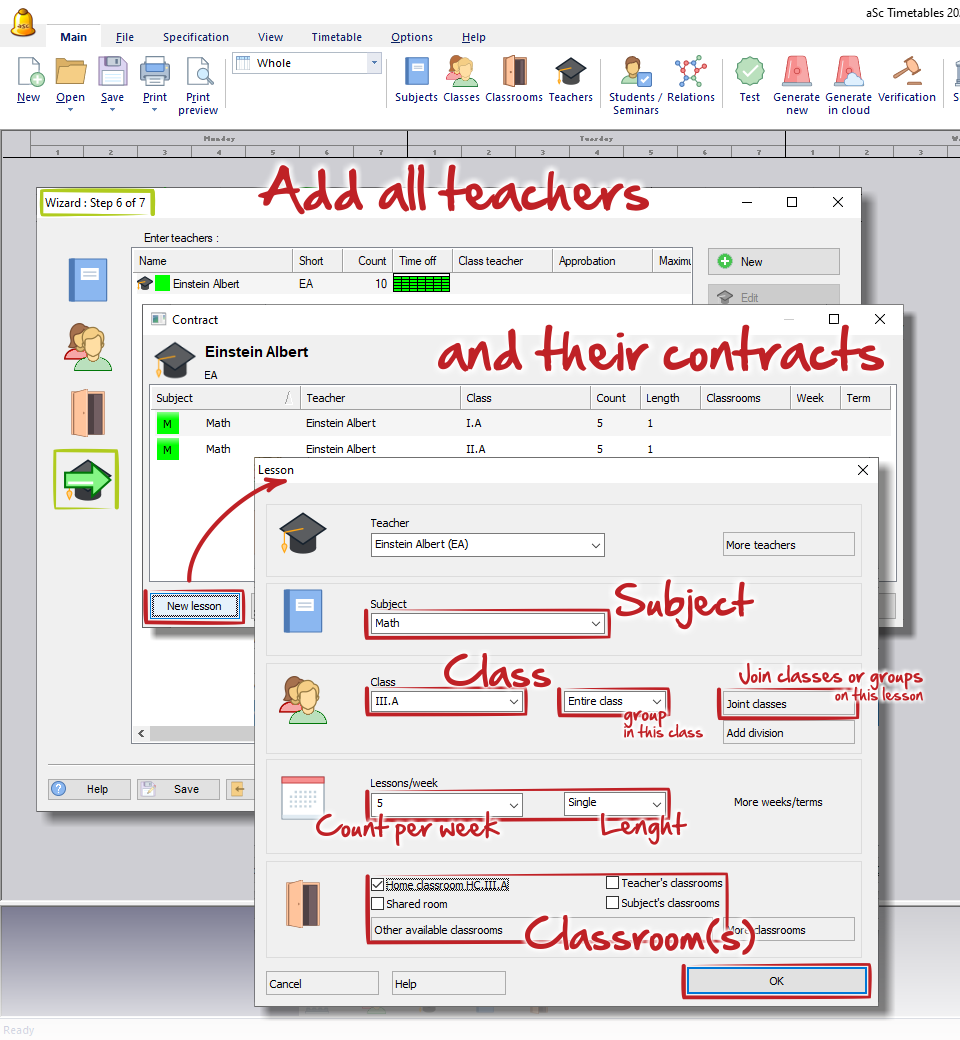
Once you add the teacher, the software will ask you to create their contract - it means all lessons this teacher will be teaching. See more details here: Adding and Editing a lesson however it is maybe better to create lessons for each class separately or by using the lessons grid.
7. In the last seventh step you can try to verify and then generate your timetable, if all your lessons are added and you are sure, that they are set correctly. If not, or you wish to make some other adjustments, feel free to close the wizard.

 Slovenčina
  Deutsch
  España
  Francais
  Polish
  Russian
  Čeština
  Greek
Greek  Lithuania
  Romanian
  Arabic
  Português
  Indonesian
  Croatian
  Serbia
  Farsi
Farsi  Hebrew
  Mongolian
  Bulgarian
  Georgia
  Azerbaijani
  Thai
Thai  Turkish
  Magyar