 Deutsch
  España
  Francais
  Polish
  Russian
  Čeština
  Greek
Greek  Romanian
  Arabic
  Português
  Indonesian
  Croatian
  Serbia
  Farsi
Farsi  Hebrew
  Mongolian
  Georgia
  Azerbaijani
  Thai
Thai  Turkish
  Magyar
 Ako vytvoriť prvý rozvrh v programe ASC Rozvrhy
prvé kroky, nový rozvrh


Keď otvoríte program ASC Rozvrhy nainštalovaný vo vašom počítači, môžete okamžite začať vytvárať nový rozvrh. Ak s ASC Rozvrhmi ešte len začínate, odporúčame vám najprv použiť sprievodcu. Pomôže vám so základným nastavením rozvrhu a s pridávaním všetkých potrebných údajov.
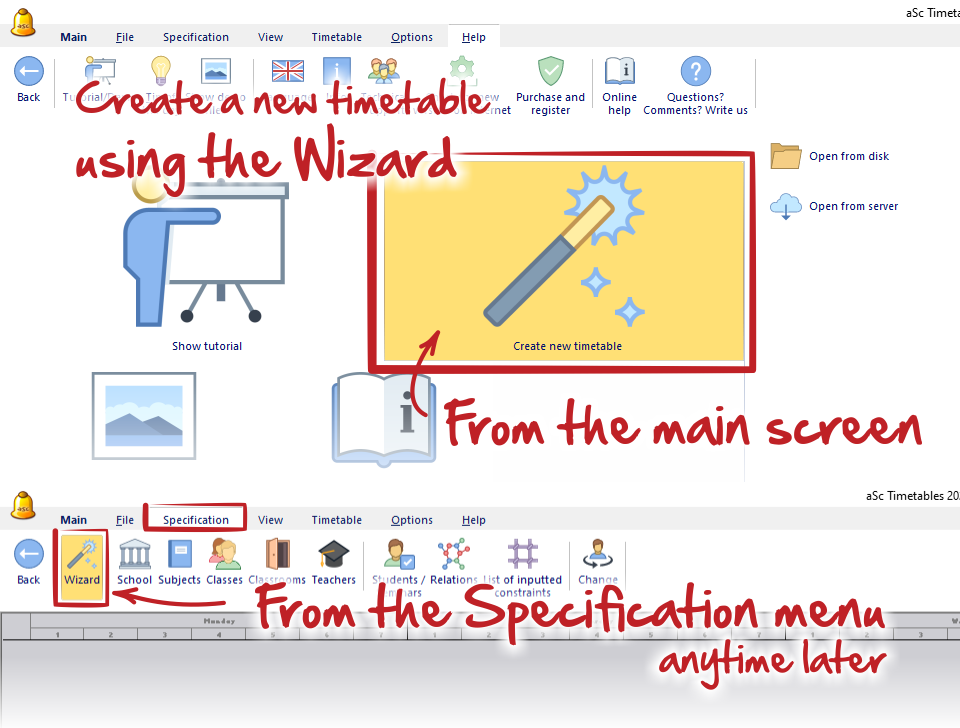
Kliknite na ikonu „Vytvoriť nový rozvrh“ na hlavnej obrazovke alebo použite ponuku „Zadanie– Sprievodca“.
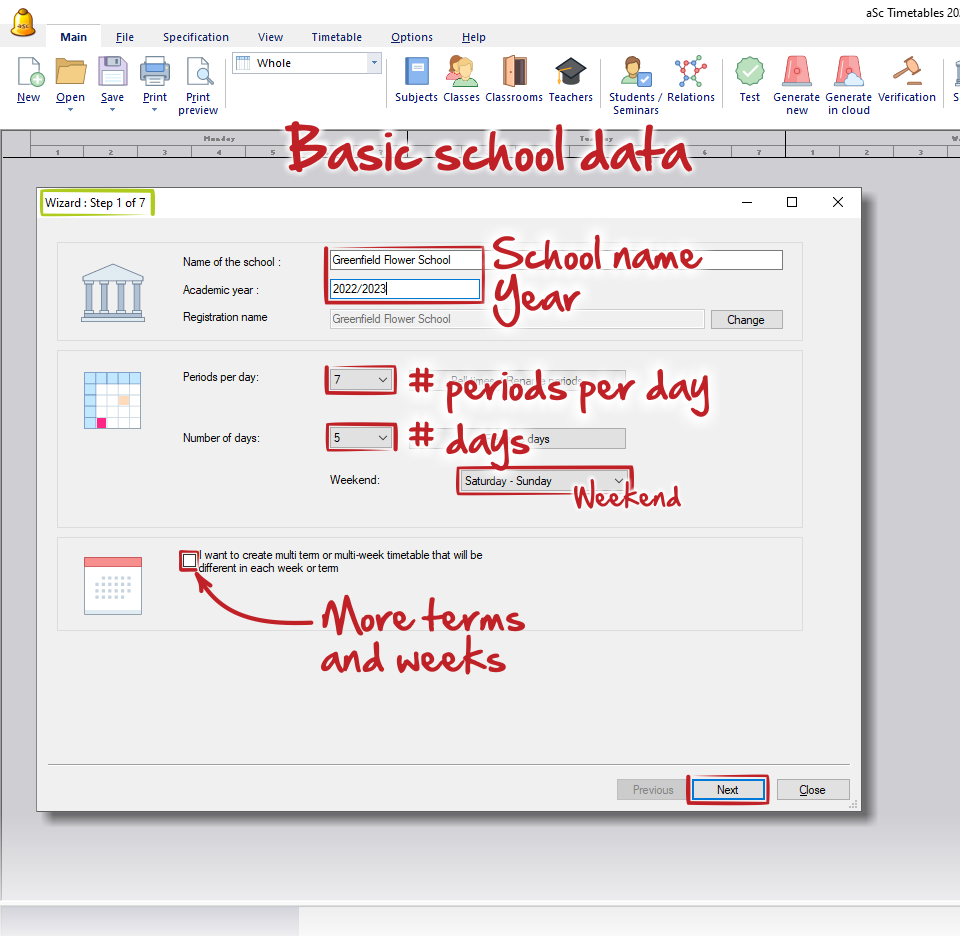
V prvom kroku vyplňte „Základné údaje o škole“ – zadajte názov školy, aktuálny školský rok, počet hodín v jednom dni, počet dní v týždni, vyberte dni víkendu a prípadne môžete vytvoriť rozvrh aj pre viac týždňov alebo období (semester, polrok).
Podrobnosti nájdete tu: Základné údaje
Keď všetko nastavíte, kliknite na „ĎALEJ“.
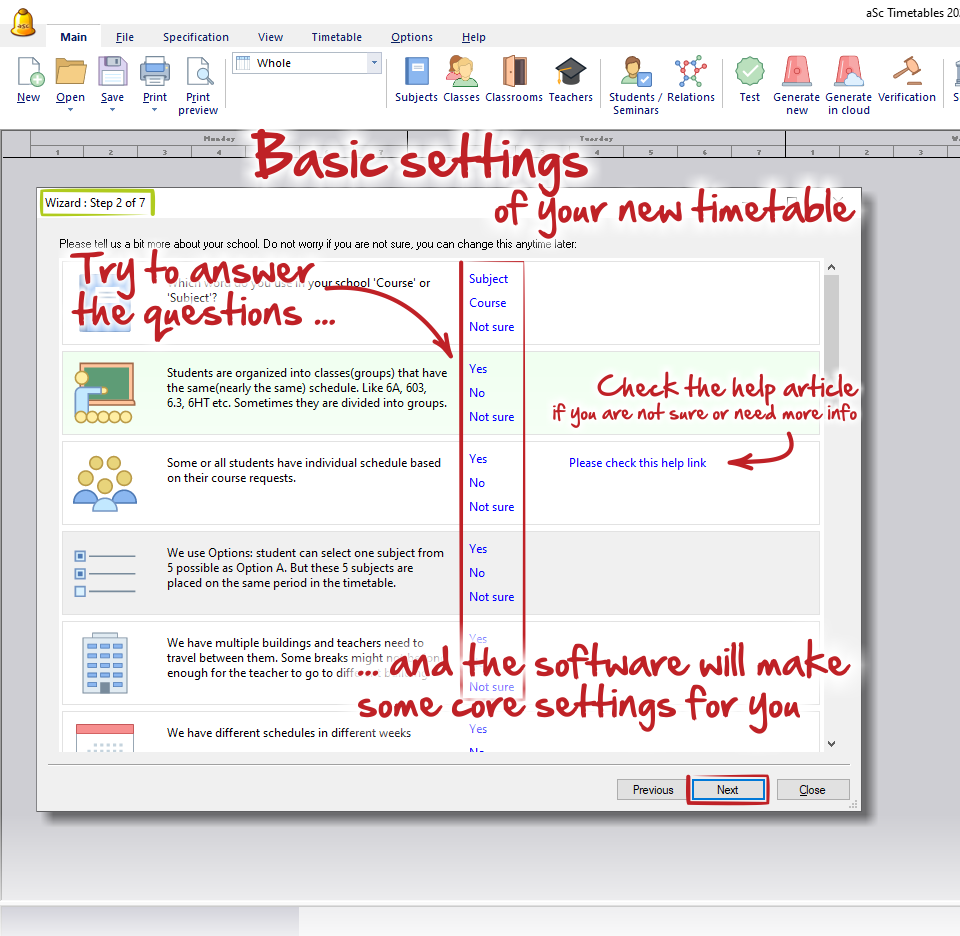
V druhom kroku sme pripravili niekoľko otázok, ktoré vám pomôžu so základným nastavením vášho nového rozvrhu. Podľa vašich odpovedí softvér automaticky nastaví jadro rozvrhu. Na všetky otázky nemusíte odpovedať – všetko môžete nastaviť aj neskôr.
Niekedy sa zobrazí aj odkaz na pomocný článok. Odporúčame vám ho otvoriť, aby ste lepšie pochopili význam otázky alebo získali ďalšie informácie.
Keď skončíte, kliknite na „ĎALEJ“.
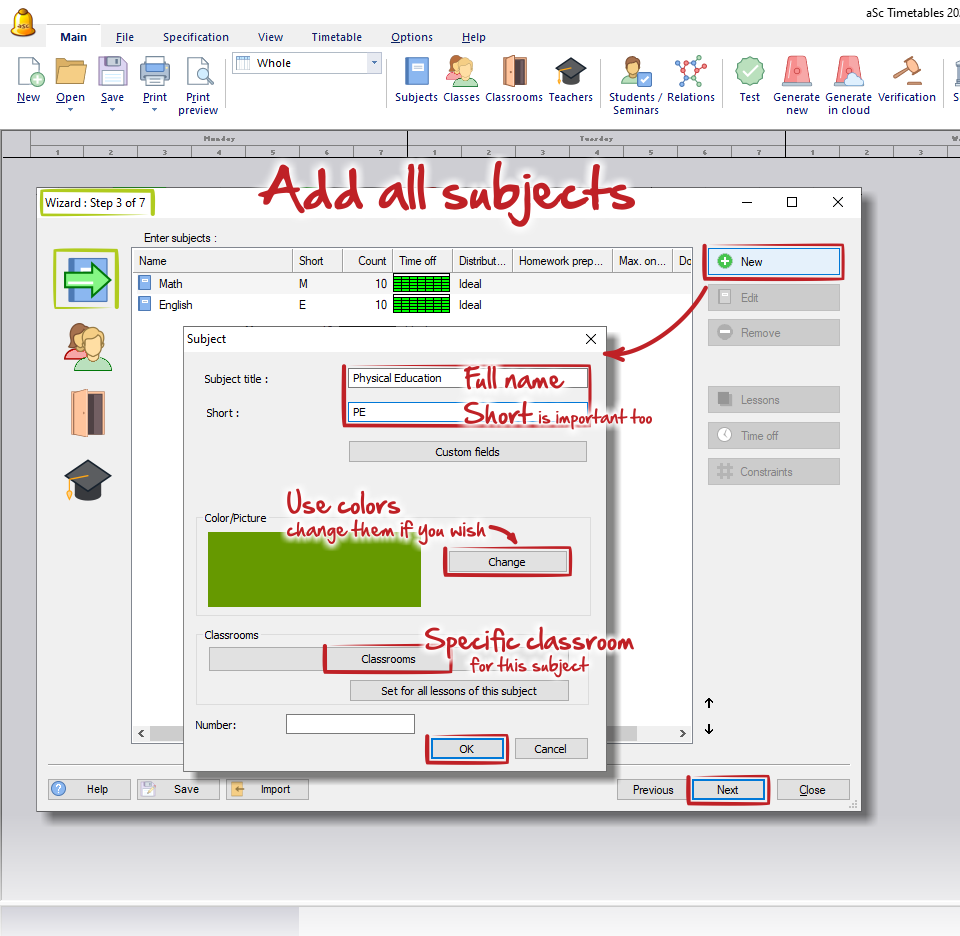
V treťom kroku budete vyzvaní vytvoriť všetky predmety / kurzy, ktoré sa na škole vyučujú. Zadajte úplný názov a skratku predmetu – krátky názov je veľmi dôležitý, pretože skratky sa v našom softvéri často používajú počas práce. Následne môžete vybrať farbu, ktorá sa bude zobrazovať na kartičkách, a môžete tiež priradiť predvolenú učebňu alebo učebne (napr. telocvičňu pre telesnú výchovu).
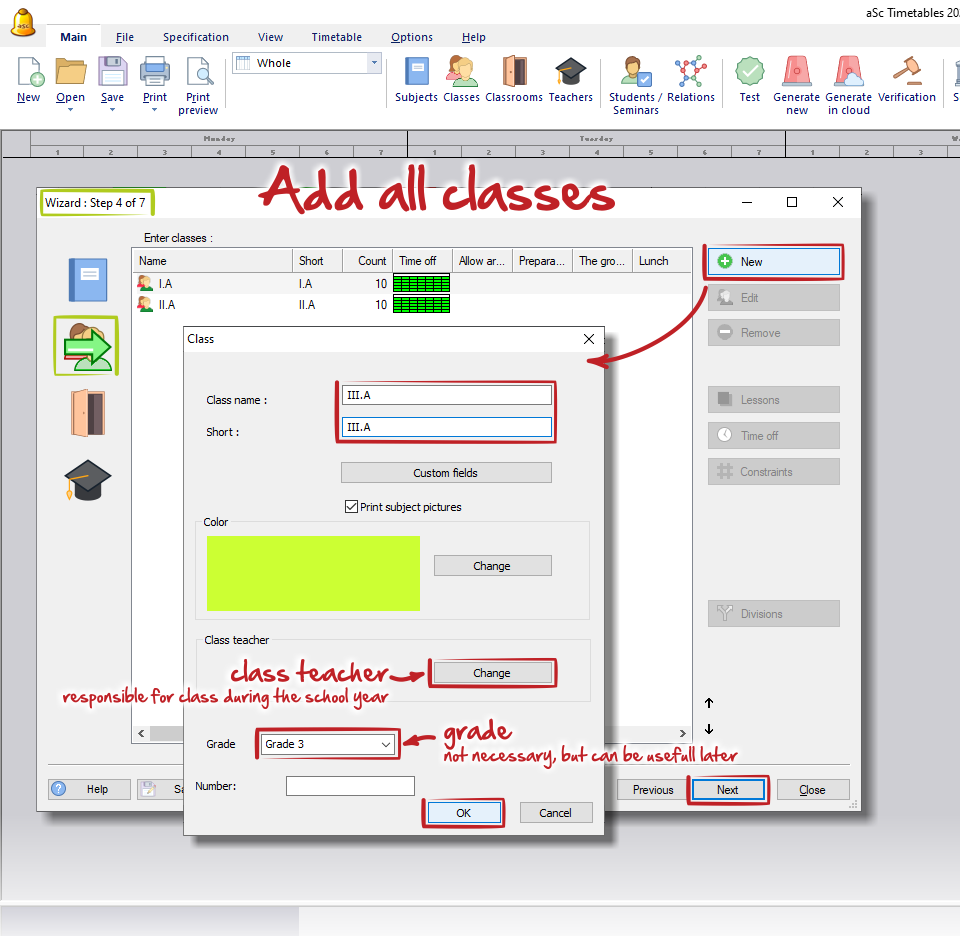
V štvrtom kroku vytvorte všetky triedy alebo ročníky. Vysvetlenie toho, čo presne znamená „trieda“ v aSc TimeTables, nájdete tu: Čo sú triedy (ročníky)?.
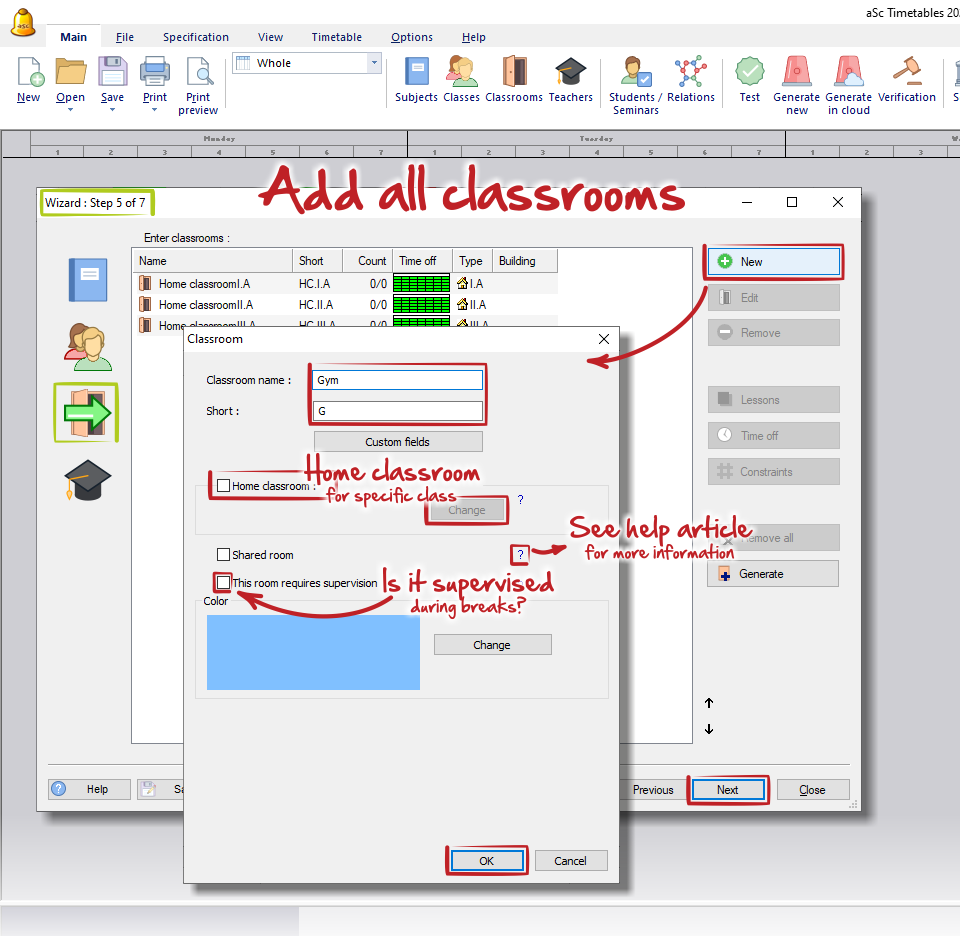
V piatom kroku pridajte všetky učebne v budove vašej školy. Nezabudnite na telocvičňu, knižnicu alebo jedáleň, ak sa používajú na vyučovanie alebo dozor.
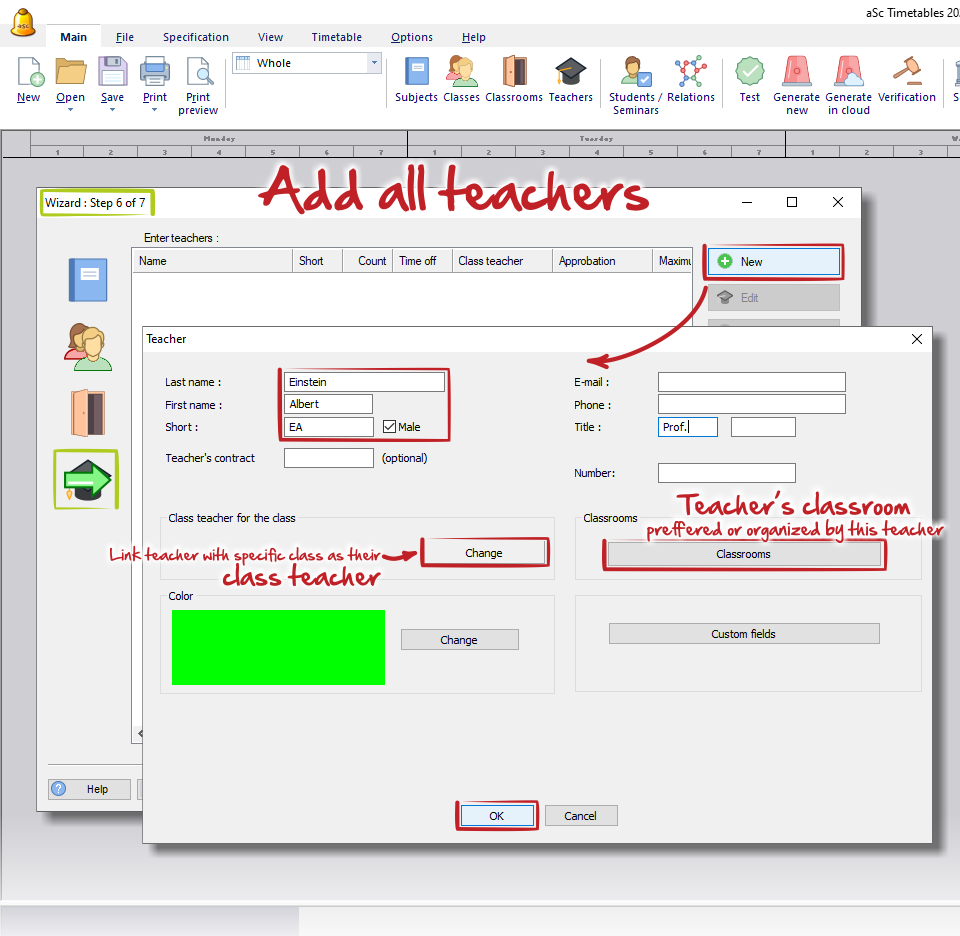
V šiestom kroku pridajte všetkých učiteľov vašej školy. Môžete im priradiť predvolené učebne (napríklad laboratóriá chémie či biológie, telocvičňu atď.).
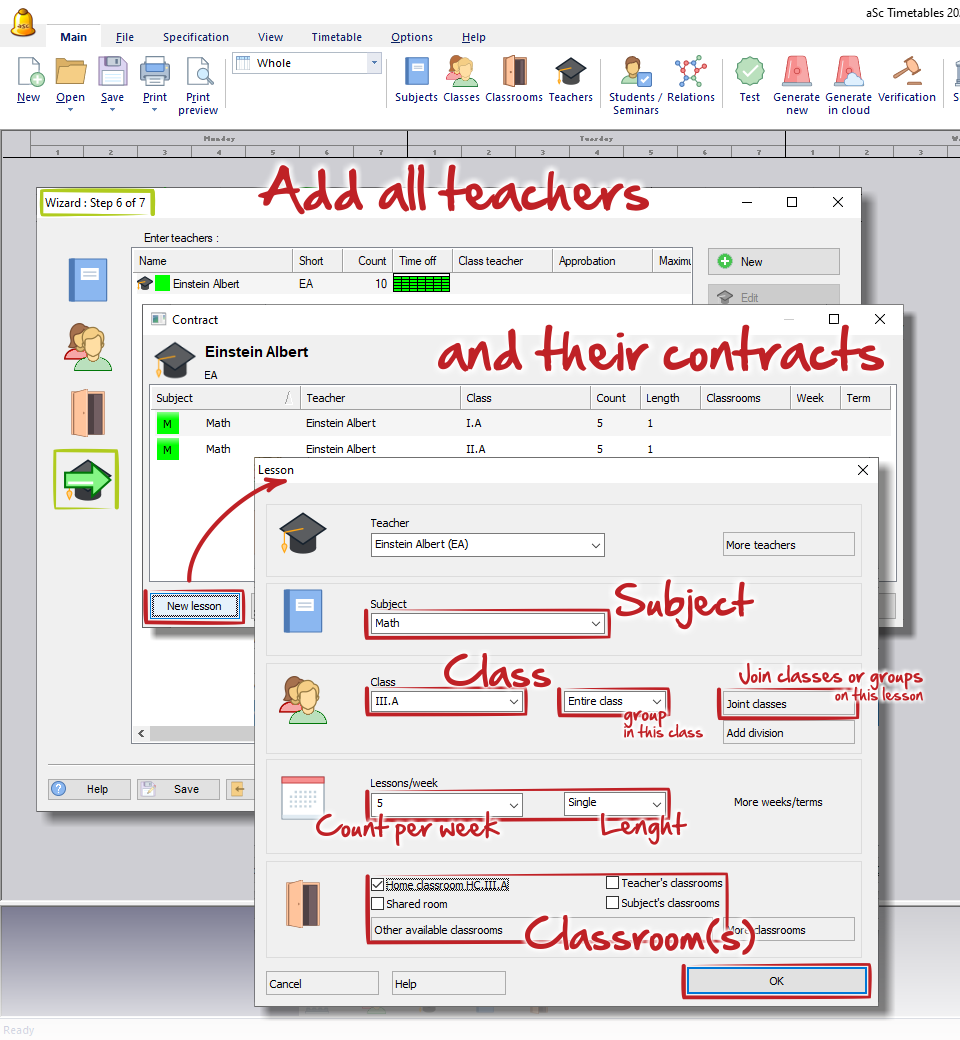
Po pridaní učiteľa vás softvér požiada, aby ste vytvorili jeho úväzok – teda všetky hodiny, ktoré bude daný učiteľ vyučovať. Viac informácií nájdete tu: Pridávanie a editovanie hodín, avšak často je jednoduchšie vytvárať hodiny pre každú triedu samostatne alebo pomocou tabuľky hodín.
V poslednom, siedmom kroku môžete skontrolovať a potom vygenerovať svoj rozvrh, ak už máte pridané všetky hodiny a ste si istí, že sú správne nastavené. Ak nie, alebo ak chcete vykonať ďalšie úpravy, môžete sprievodcu jednoducho zatvoriť.
