
 España
  Francais
  Čeština
  Romanian
  Arabic
  Português
  Indonesian
  Croatian
  Serbia
  Farsi
Farsi  Georgia
  Azerbaijani
  Thai
Thai  Turkish
  Magyar
 How can I input individual students


Input the individual students into the timetable only for timetabling purposes and if your timetable is based on students’ choices. Otherwise it is not necessary and you can use the basic class - division - group approach.
See: How to input Options - each student needs to select one course from Options1 and one from Options2
Before adding students, it is necessary to create the classes, because each student must be assigned to exactly one class.
See: What are classes (grade levels).
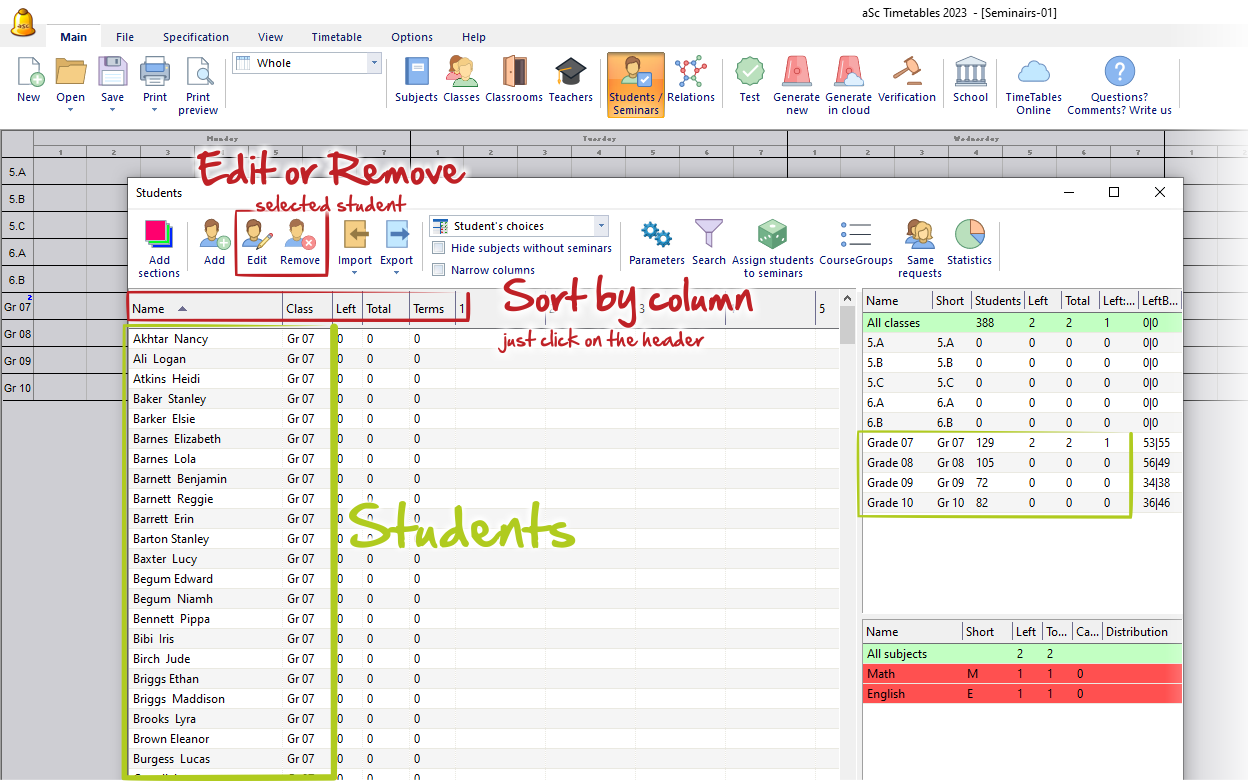
Then you can input individual students in the main menu Students/Seminar - Add. The dialog with two options will appear.
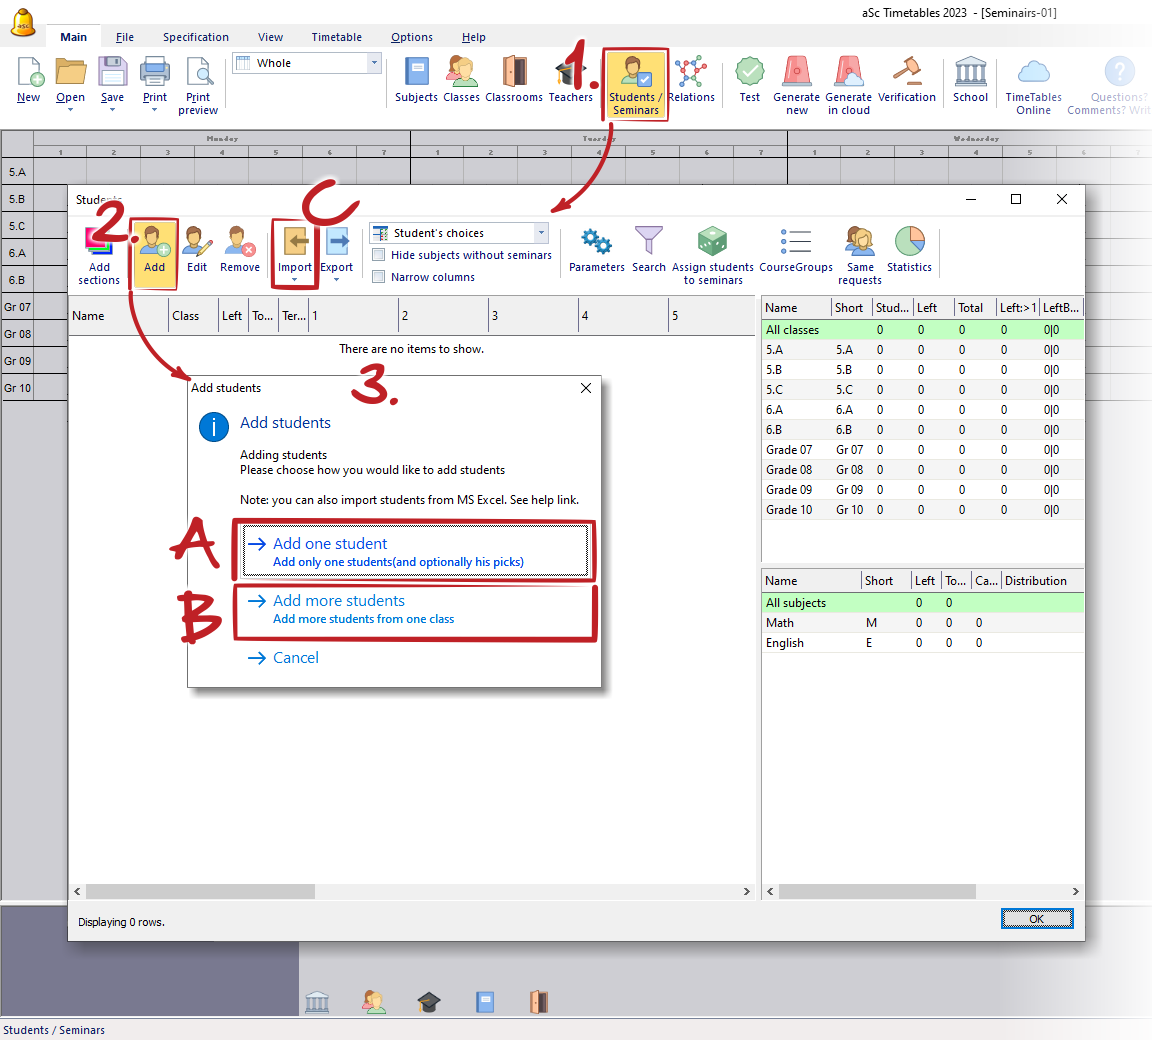
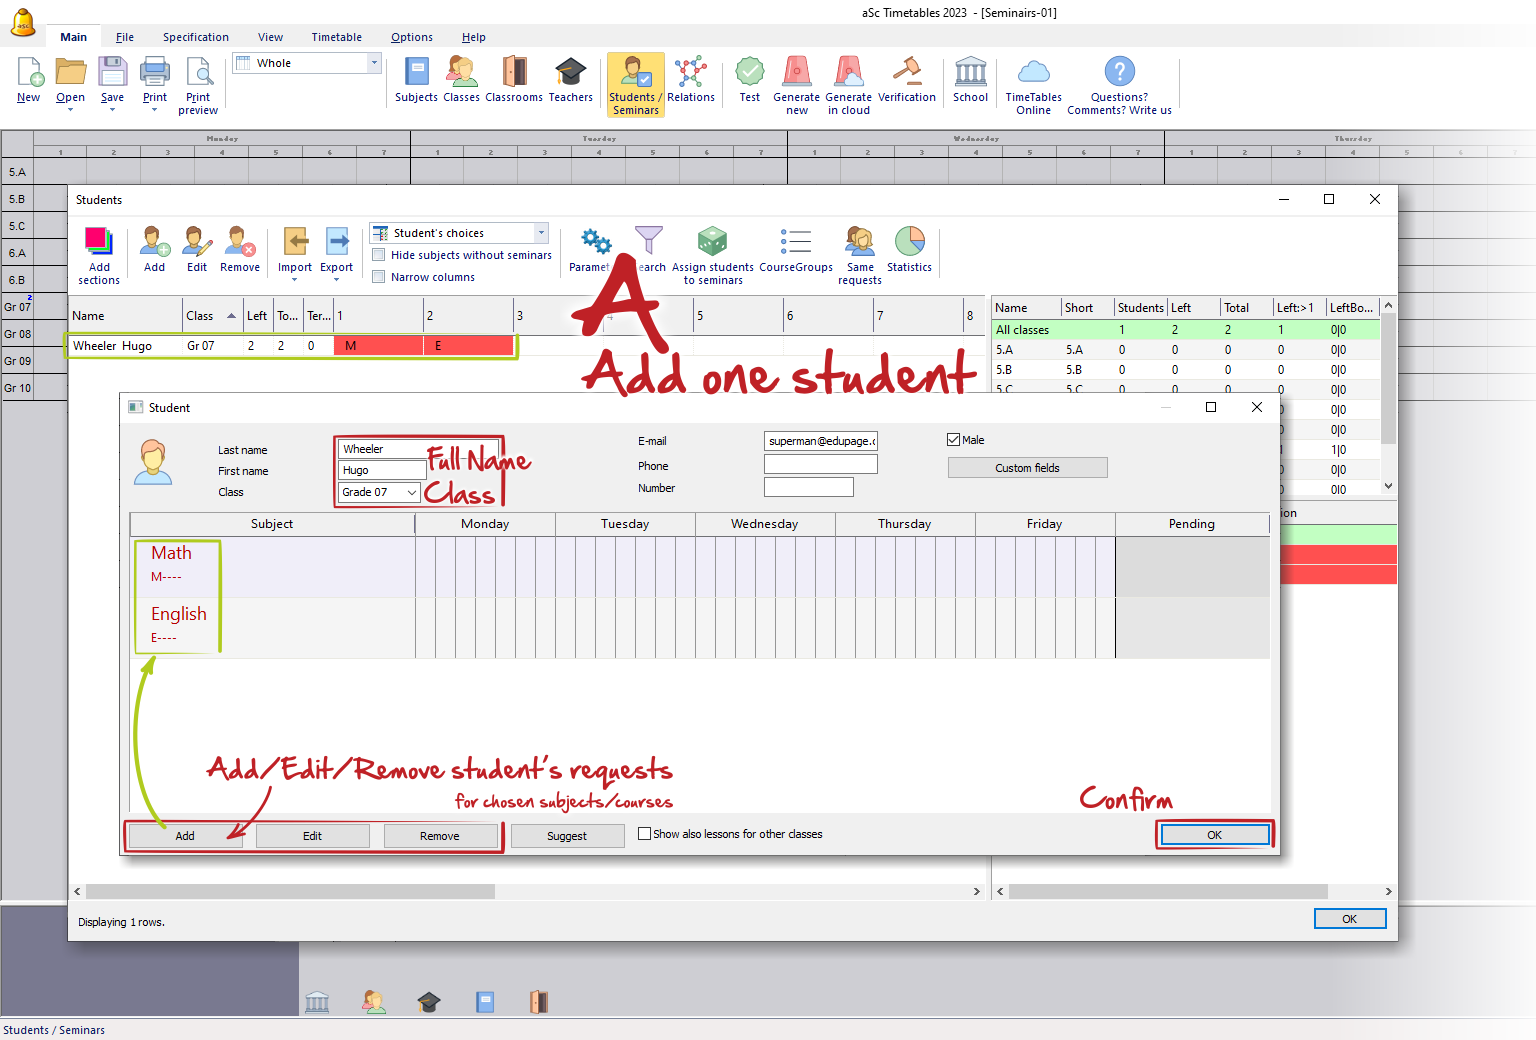
A. Add one student
If you choose the first option, the new dialog Student appears.
Here you can specify - the student’s full name (Last name, First name), select the class/grade the student is assigned to (which you created earlier), and optional information such as email or phone number. If you choose this first option, you can also directly specify all subjects (courses) this student has chosen:
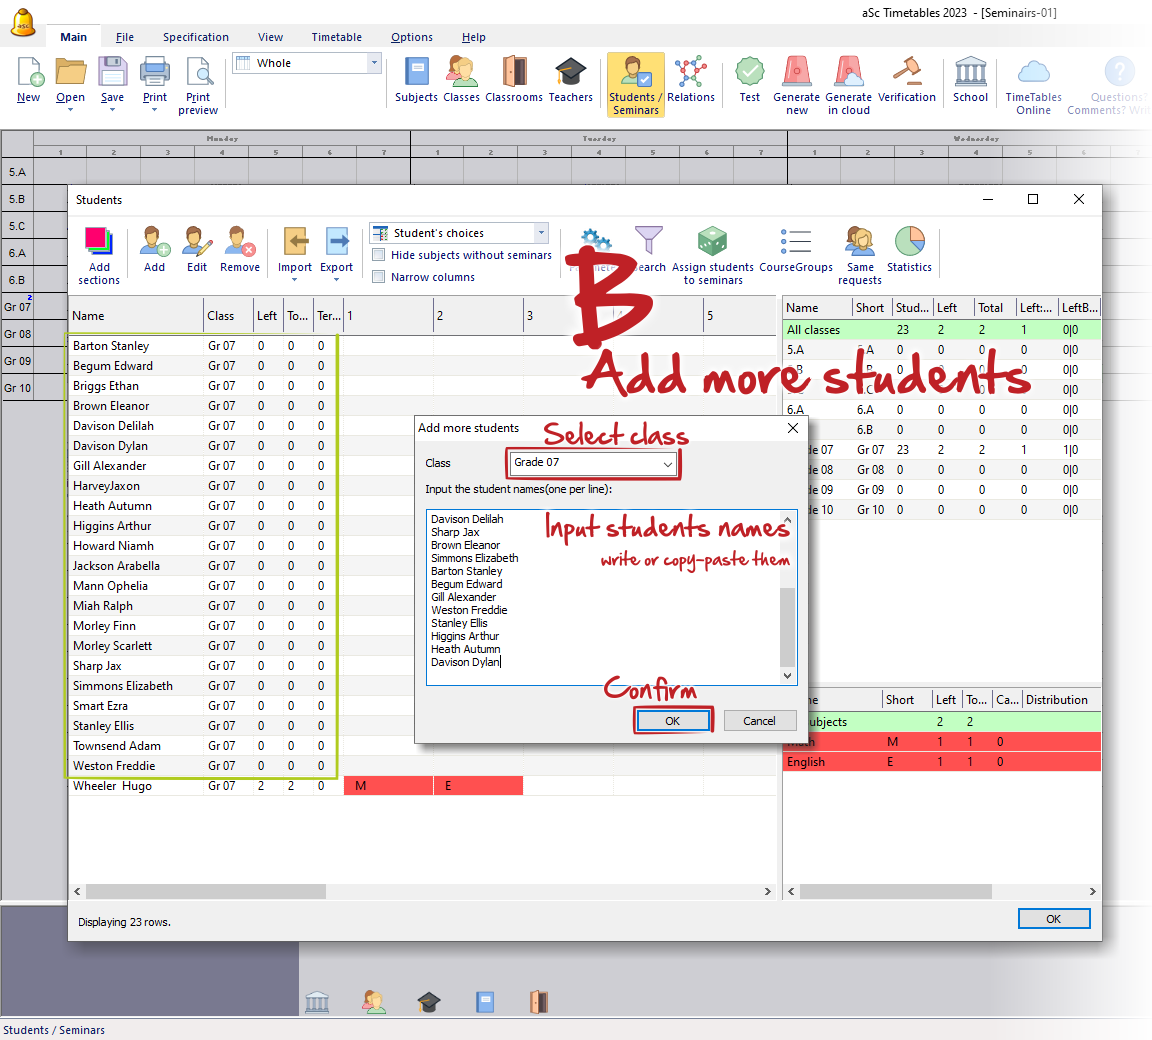
B. Add more students
The second option displays a dialog where you must specify the Class first and then input the names of all students assigned to this class (one line per student). The order Last name/ First name follows this setting: Configure name format (First name / Last name)
Note
Entering the students’ subject choices can be done for multiple students at once in other ways, so this second option may be more convenient and faster.
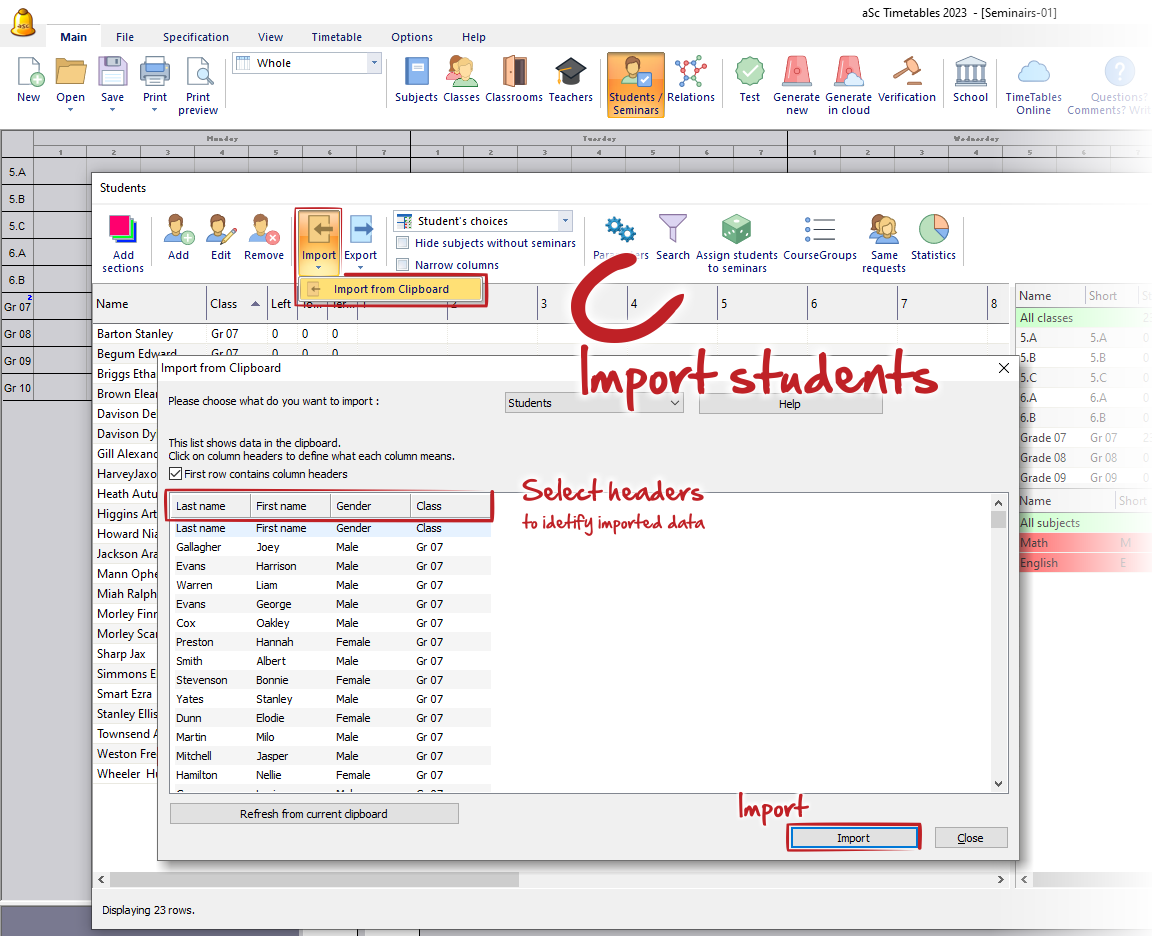
C. Import
You can also add students using the "Import" function.
See these two articles for more information:
Import students' course(seminar) selections from clipboard(Excel) - Method 1
Import students' course(seminar) selections from clipboard(Excel) - Method 2
As a result, you will see a list of all new students that were added or imported. In case you need, you can sort the list by any column by a simple click on its header. To sort the list by multiple columns, hold the Shift key on your keyboard and select a second column (e.g., first sort by class, then by name).
See also:
How can I input students picks
How to create sections of courses for subjects
How to generate timetable with students
The student’s timetable view
Pending students view