
 España
  Francais
  Polish
  Čeština
  Romanian
  Arabic
  Português
  Indonesian
  Croatian
  Serbia
  Farsi
Farsi  Mongolian
  Bulgarian
  Georgia
  Azerbaijani
  Turkish
  Magyar
 How to set the initial credit / import from the different software
initial credit


If the school is migrating from a different software to the EduPage, transferring remaining balances for meals can be done manually by entering them for the students or by importing them from an Excel file.
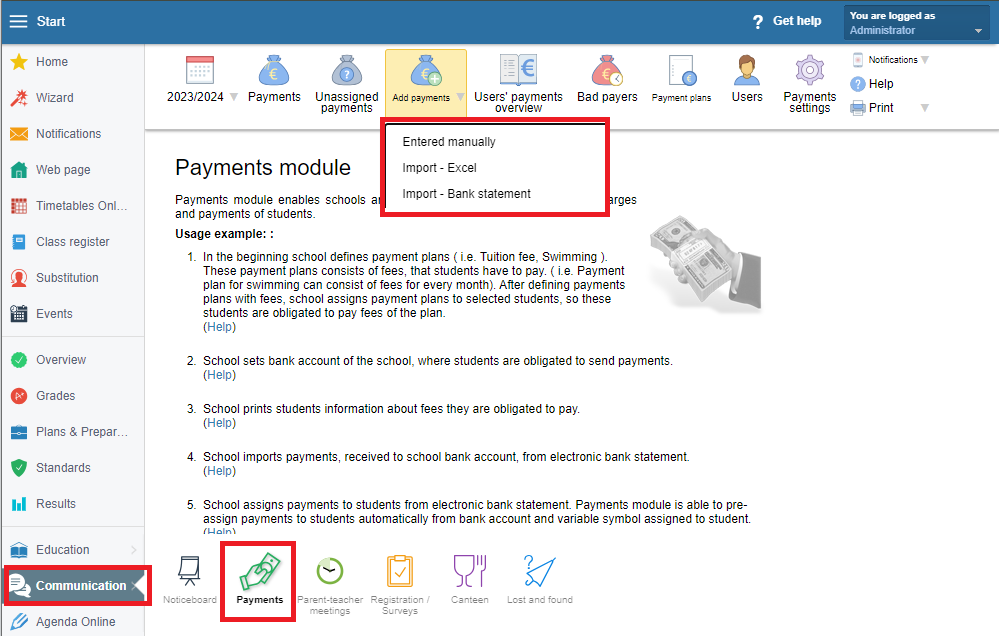
The balances from the previous school year on EduPage are referred to as 'initial credit' and can be entered in the 'Payments' module. You can access the payments module through the left menu under 'Communication' or as one of the tiles on the homepage after logging in.
Before entering the initial credit, it's recommended to set up the following:
- In the payment module, configure the school's/canteen's account to which meal charges will be collected, and name it -=Setting information about school's bank accounts
- In the canteen module, establish an payment plan for meals - Payment for canteen.
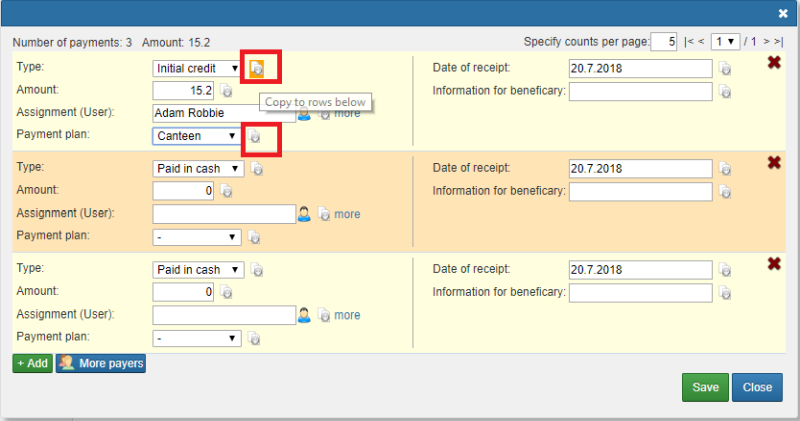
'Entered manually' - enter individual recipients in the open dialog box.
Select Initial credit as the type of payment, for payment plan choose Canteen or name of payment plan created by Canteen module (Payment for canteen).
If you want to add more boarders, you can do it via the green 'Add' button (add one) at the bottom left or via the blue 'More payers' button, where you can also choose whole classes.
Details, such as 'Type' and 'Payment plan' are only set for the first payer and clicking on the icon in the marked red box will copy the content to the rows below. Do not forget to 'Save'.
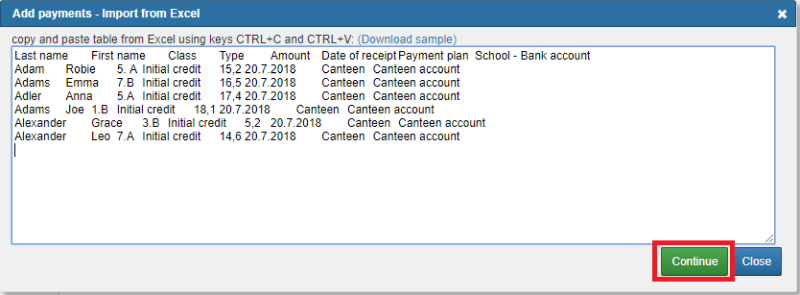
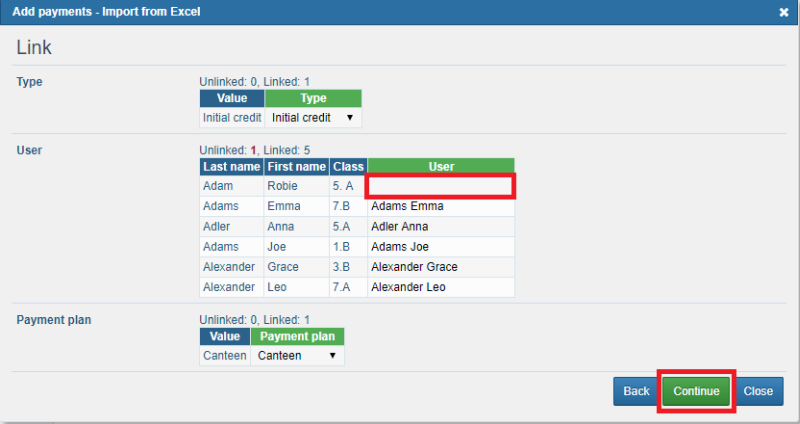
'Import - Excel' - if you have more data prepared in e.g. excel spreadsheet, it is good to have it prepared with the recommended header. According to the example in the picture the filled in details are the name, surname and class of the student, the amount and name of the payment plan and the account (either the number or the name).

You simply mark them and copy via 'Ctrl + C' and 'Ctrl + V' into the open dialog box. Press 'Continue'.
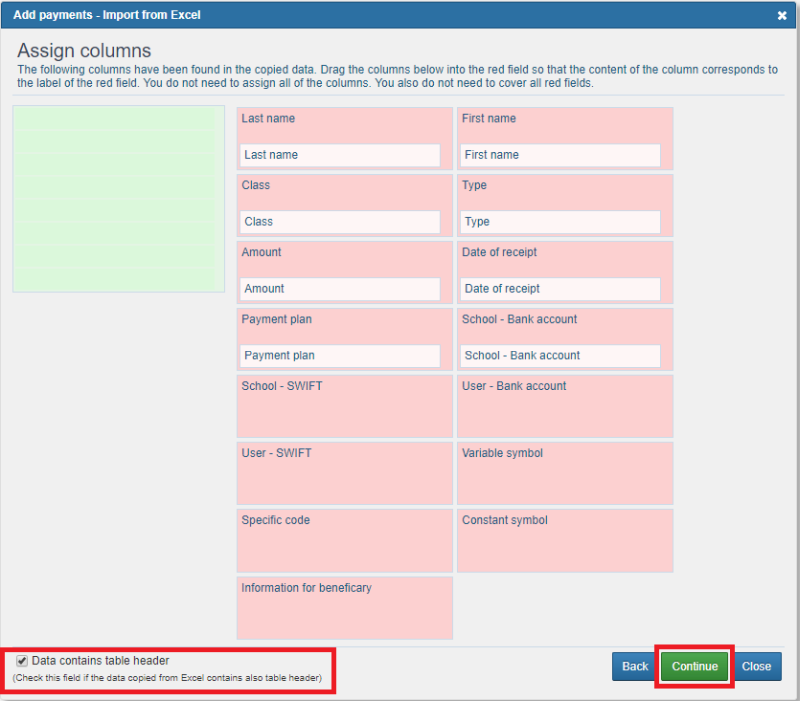
In the following dialog box the excel header is paired with the header in the system, but you have to mark the box at the bottom left. Press 'Continue'.
The next picture shows that one payment was not assigned - a mistake in the student's name - by simply editing it in the 'User' box you can fix this error. Press 'Continue'.
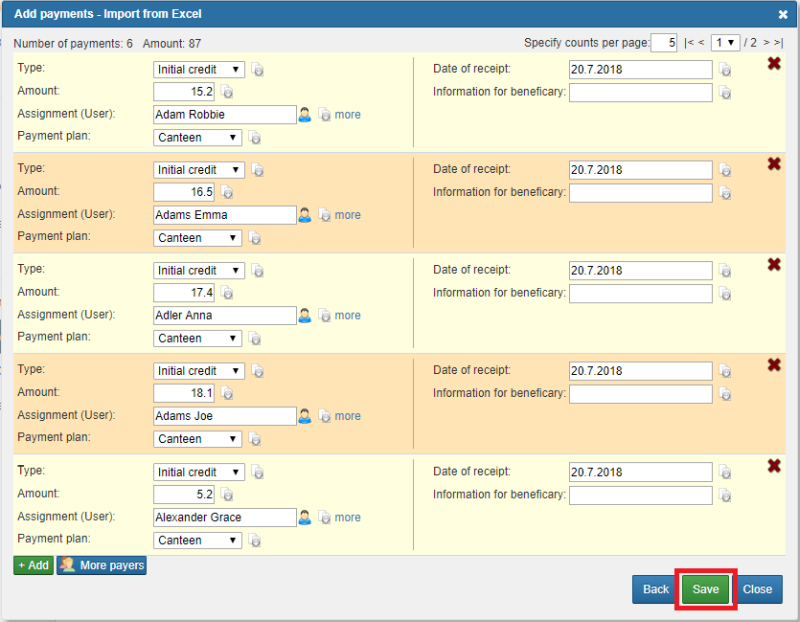
The same dialog box opens as for manually entered payments but you already have everything filled in. The dialog can contain multiple pages. Check and you can 'Save'.
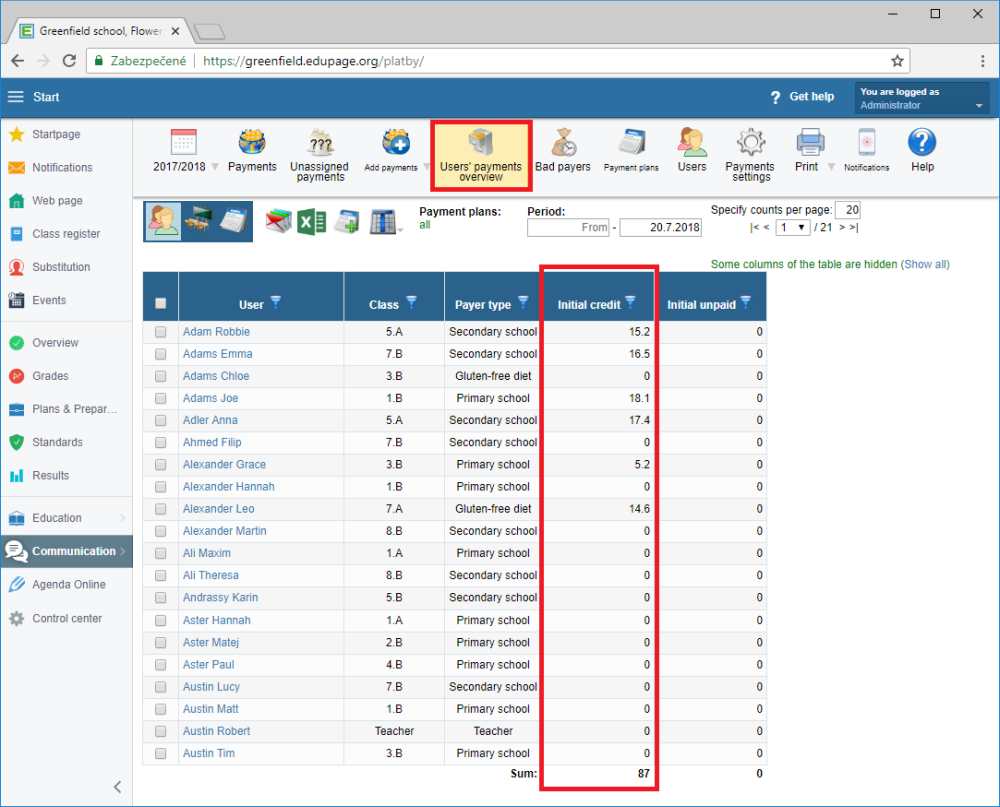
The initial credit in the system is under the received payments and you can find it in the payment module under 'Payments' or 'Users' payments overview' section. Watch out for column filters turned on, 'Initial credit' may be hidden.
Please see also - List of all helps for payment module