 España
  Francais
  Polish
  Čeština
  Greek
Greek  Romanian
  Arabic
  Português
  Indonesian
  Croatian
  Serbia
  Farsi
Farsi  Hebrew
  Mongolian
  Bulgarian
  Georgia
  Azerbaijani
  Thai
Thai  Turkish
  Magyar
 How to create different overviews and export them to excel


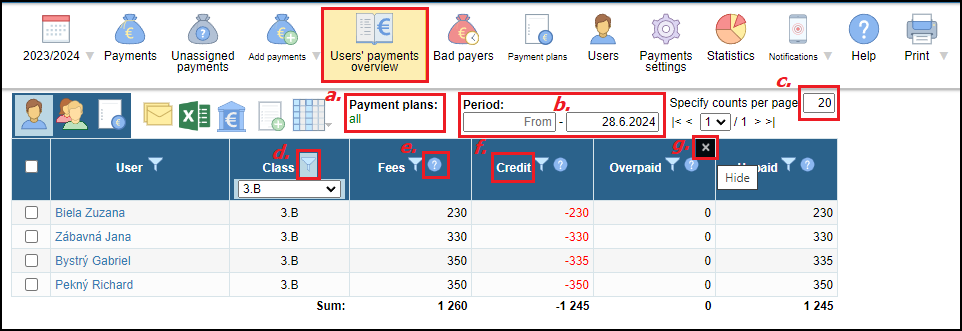
How to use different filters in Users´payments overview:
a) payment plans - you can select all of them, a single one or several payment plans together
b) time period - you can set your own time period. However, bear in mind that there is a relation to the maturity date of the filtered payment plan; e.g. if you want to see the fees (overpayments/underpayments), but it is still before the due date, you must enter a higher date (at least the due date) otherwise you could see zero fees or an excessively high overpayment.
c) number of rows per page - can be set according to your needs
- we recommend small number of rows while setting the filters as the displayed numbers are recalculated (which is much easier done for 10 rows than 500 rows)
- to export the filtered data to excel, display the maximum number of rows per page, to fit all the data into the export file (all data should be displayed on 1/1 page)
Tip: It is recommended to establish overpayments for inividual payment plans separately and with the maturity date in mind. A school can have multiple payment plans and if checking several payment plans together, an apparent overpayment might only be an advance payment for a payment plan with maturity date after the selected time period.
d) funnel - the icon next to the title of the column enables filtering data in that column (e.g. name of the student, class, credit from 0,01 ...)
e) question mark - the icon next to the title of the column displays information about the exact meaning of the column's data
f) title of the column - click the title in the head of the table and the rows will be ordered according to that column. Click again and the rows will be ordered in reverse.
g) X - any column can be hidden - remember to check and disable filter in this column before hiding it
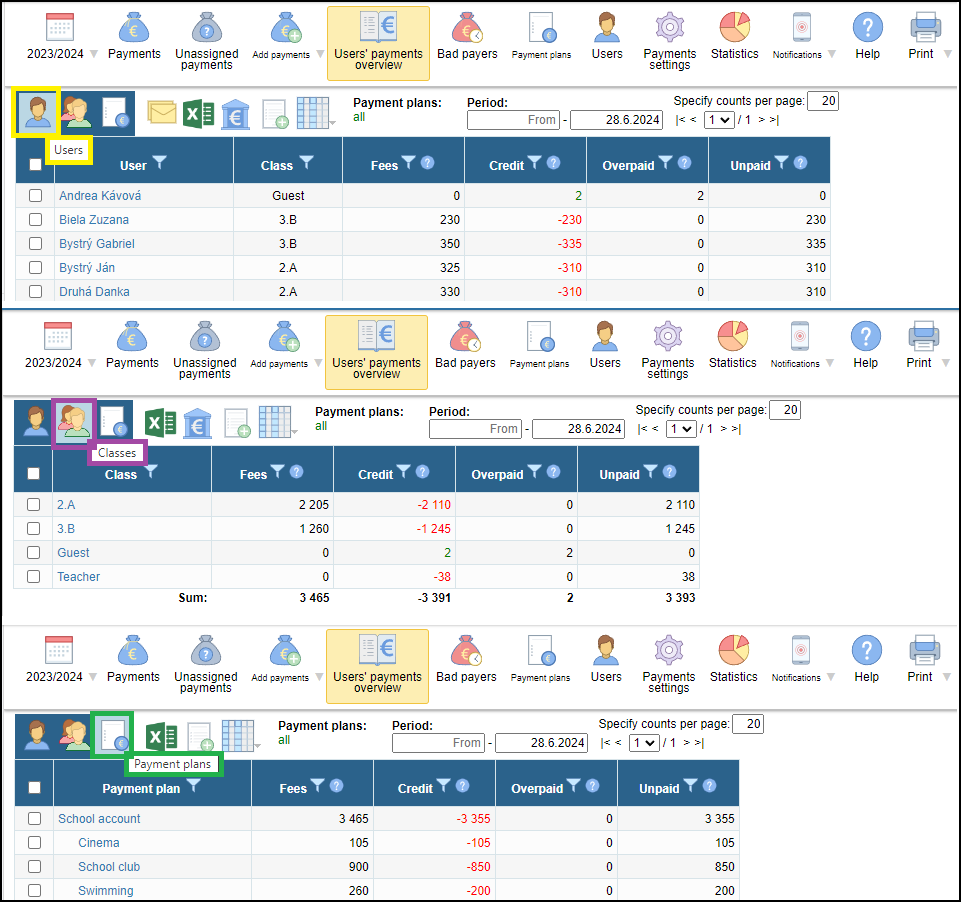
Different overviews:
The table can be adjusted. You can arrange the data by users, by classes or by payment plans.
How to disable the filters:
- disable the filter for a specific column and press enter
or
- refresh the web page (e.g. with the key F5)
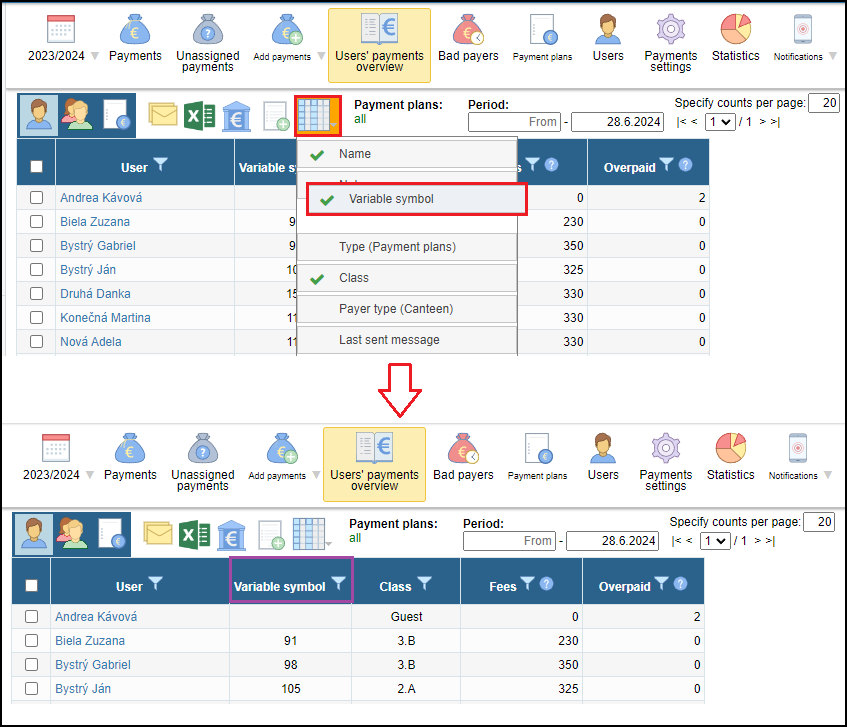
How to change the order of the columns:
Click on the icon over the table for displaying columns, change the order of the columns. Simply drag the field with the name of the column and move it to its new position.
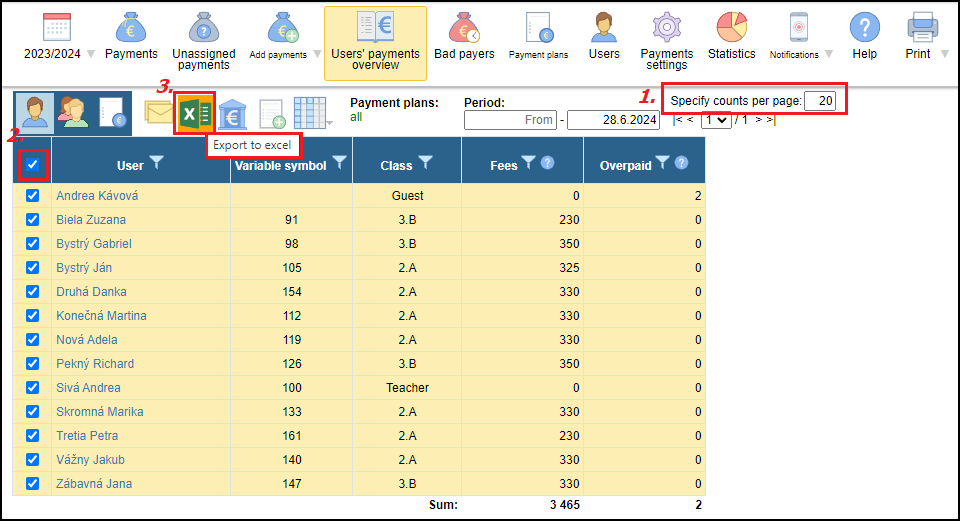
Export to Excel:
After you have created the required overview via selected filters you can select adequate number of rows to display all the records on one page before exporting to Excel (1.). Mark all the users (2.) and export data to Excel (3.).
Please see also - List of all helps for payment module